Body
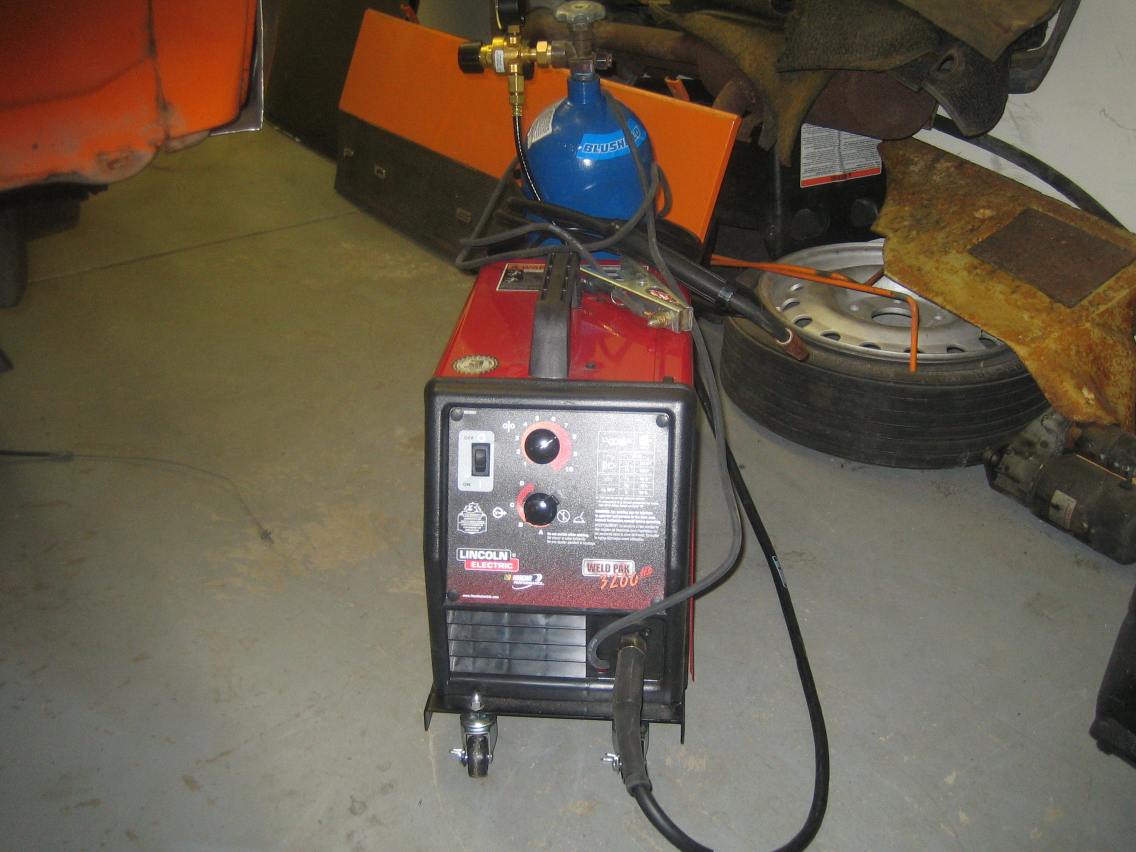
So this is one of the new areas that I wanted to become more proficient at, one of the big investments is the welder and a Miller machine would have been nice but my use of the machine will be sporadic over the years so I ended up with a Lincoln 135A welder. I bought the shielding gas bottle from a local outfit, I know you can rent it but it wasn't that expensive and now its mine to do with how I see fit.
I practiced a bunch and found having the gas turned on makes a big difference to the weld quality, I still need to practice a lot more but decided after a few hours I would try something inconspicuous on the car. Well how about an area no-one will ever see?
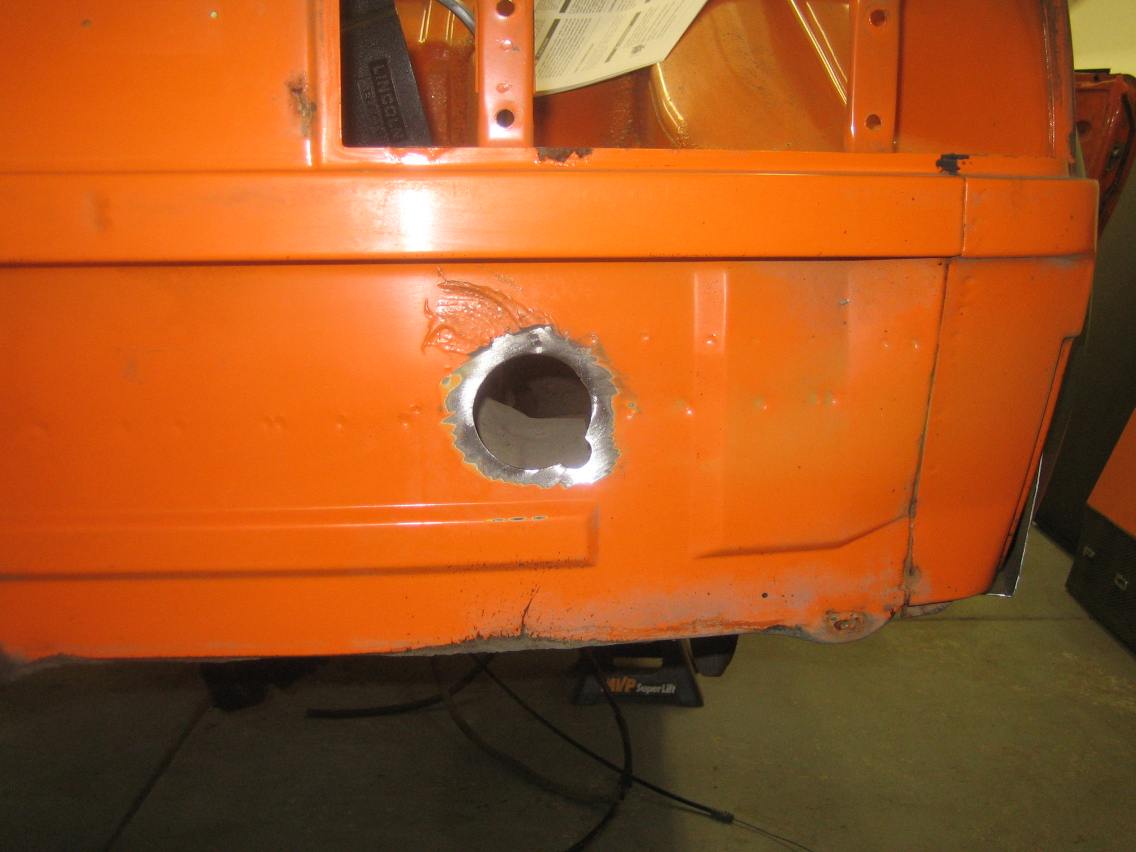
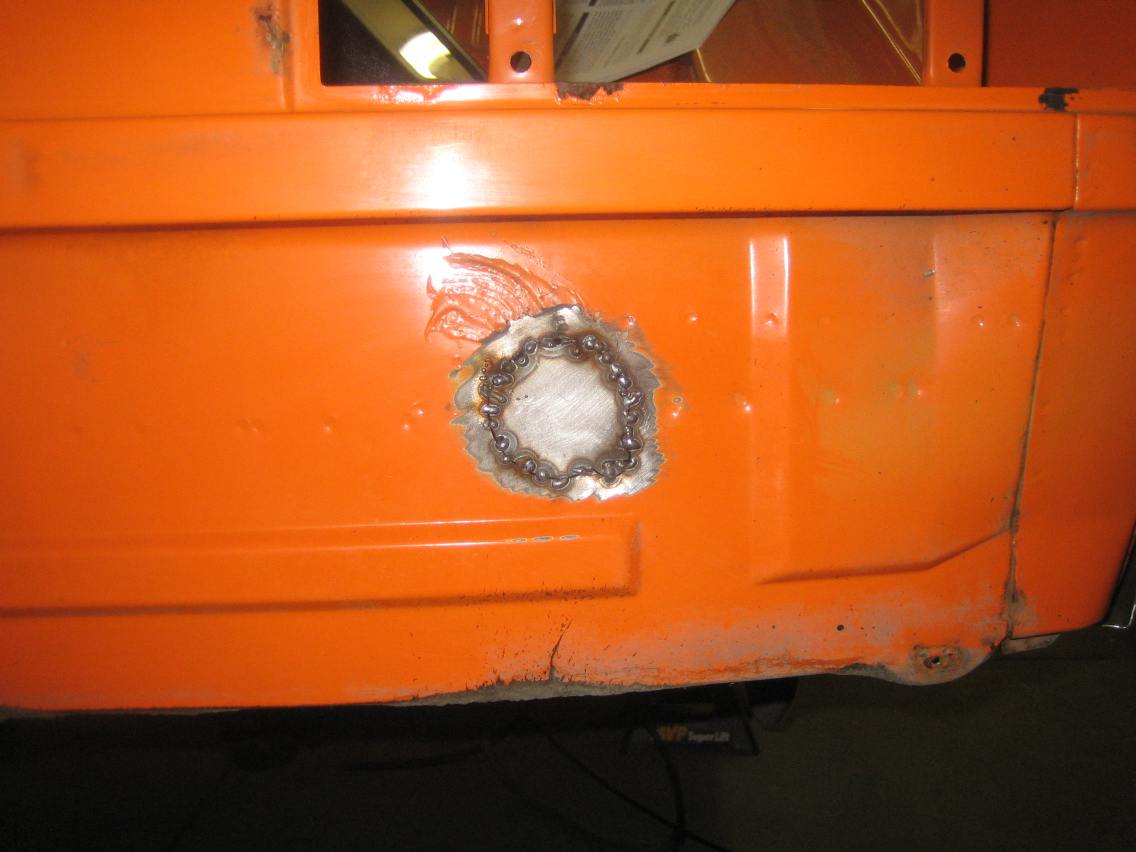
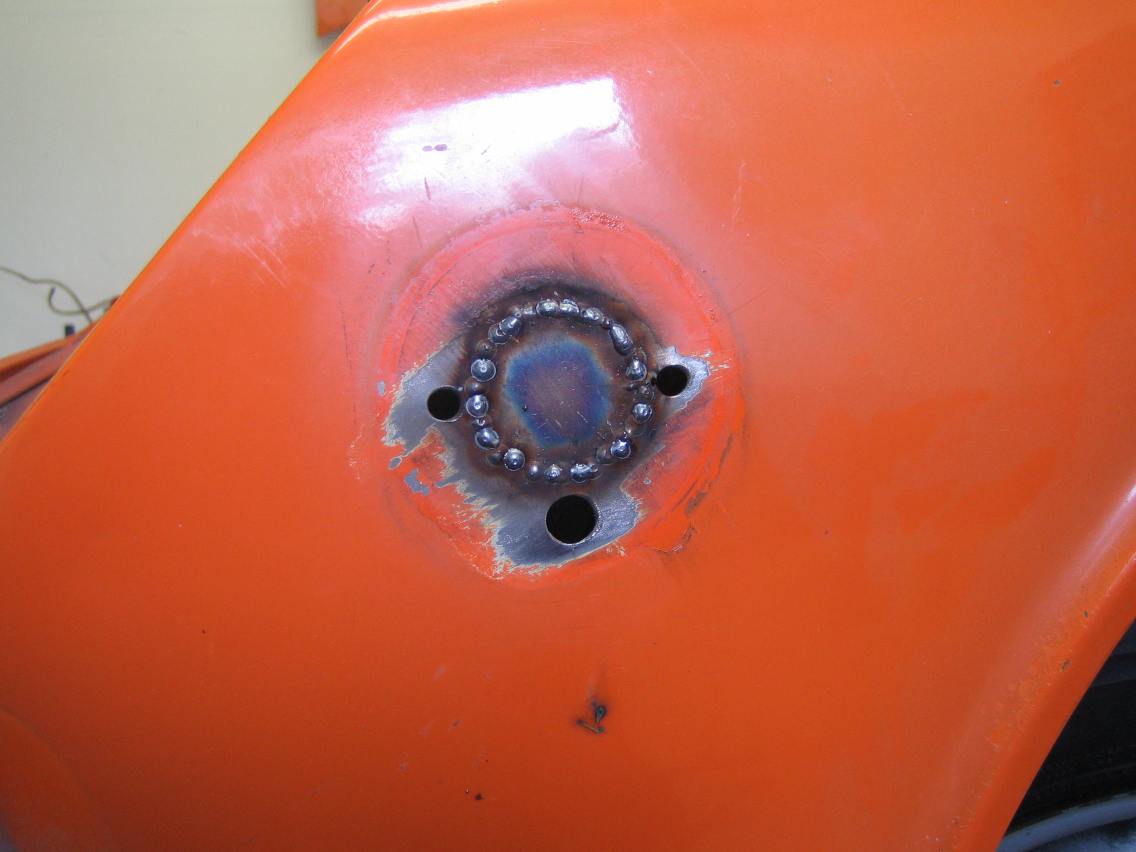
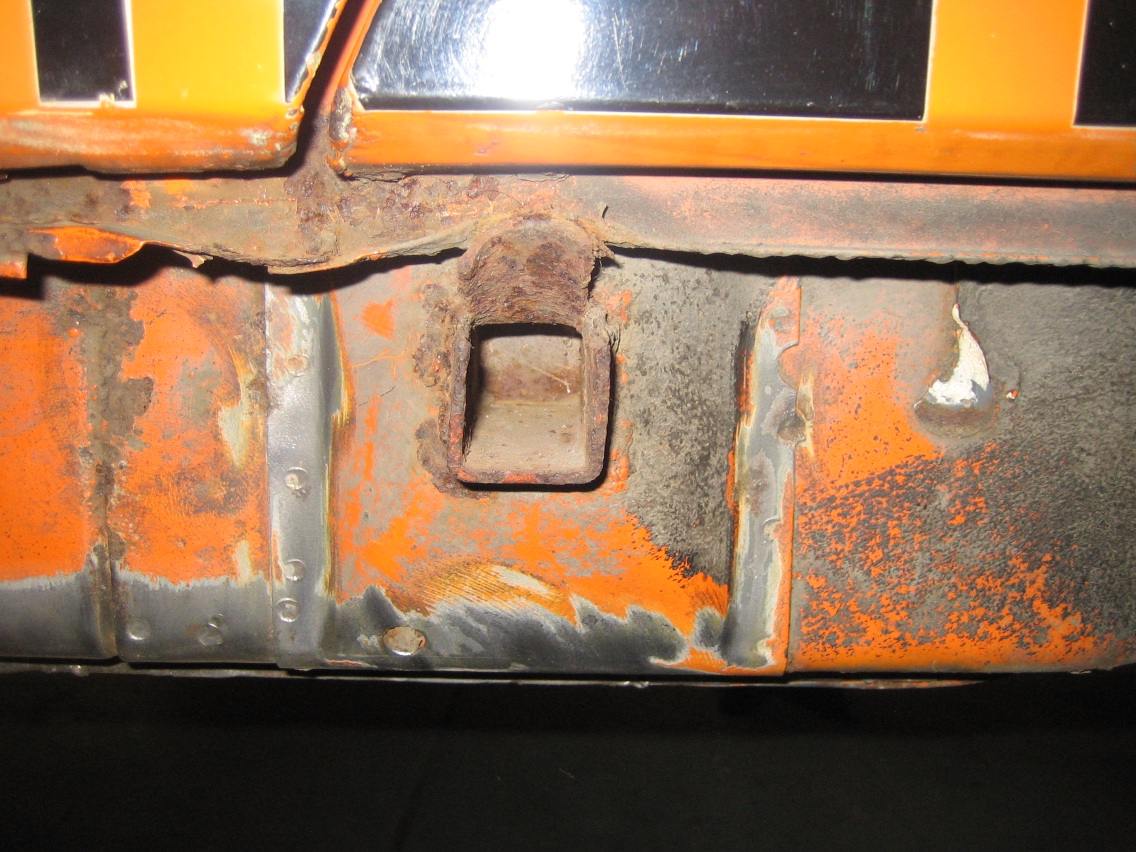
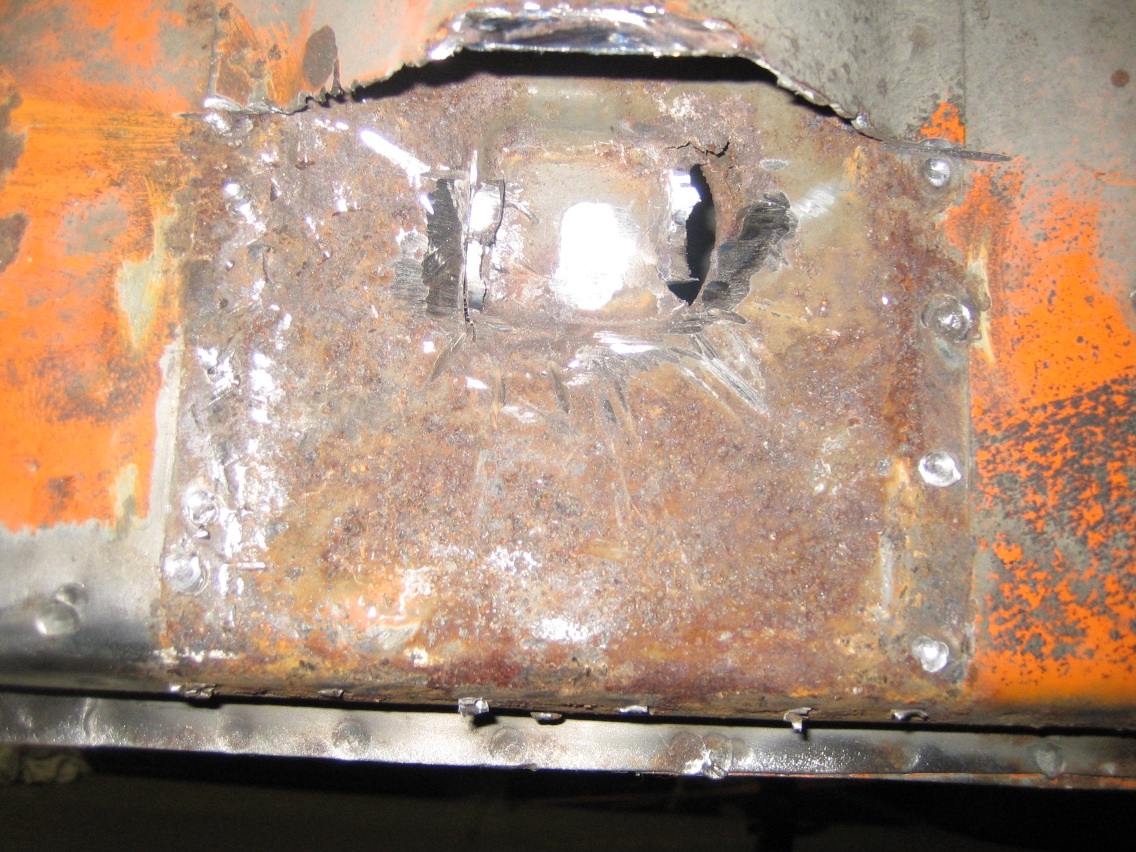
Hence the choice of plugging the holes for the bumper shocks, this area will be masked very nicely by the chrome bumpers !
First I prepped the area and then cut out a patch and held in place with my magnet buddy.

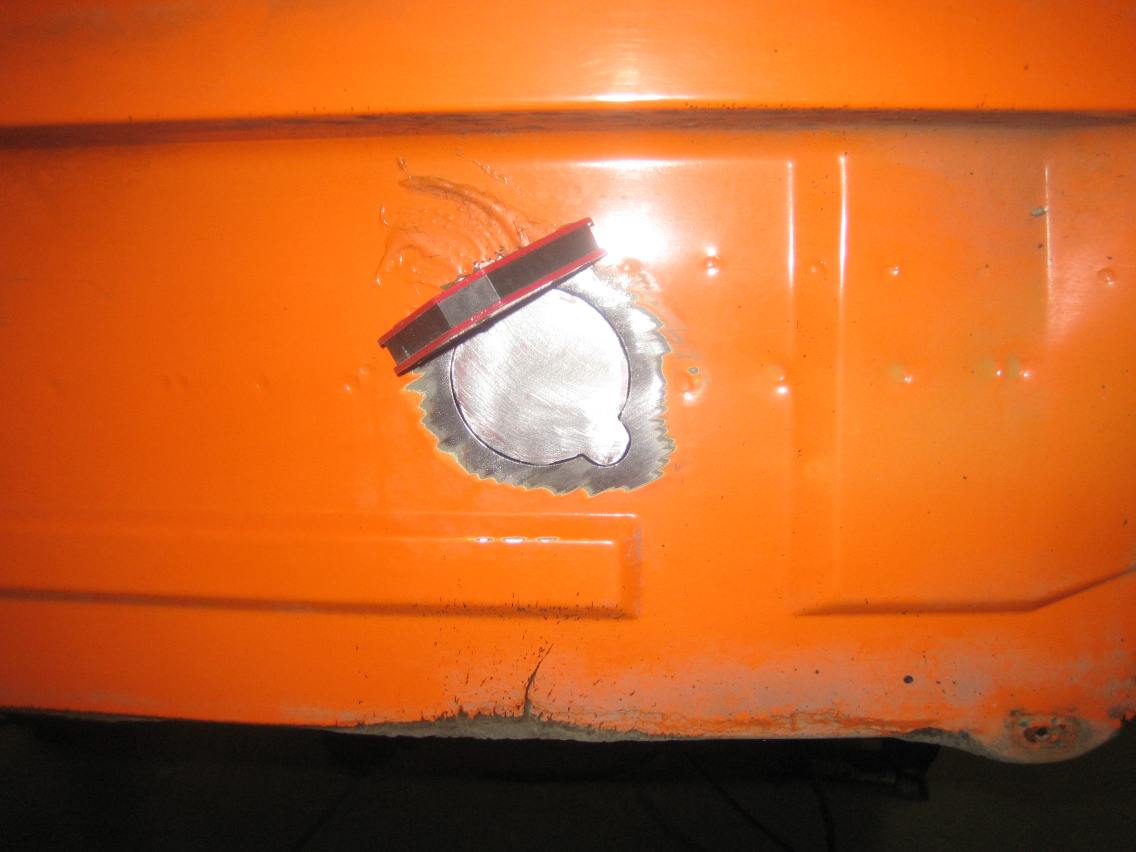
A couple of tacks next to hold it in place.
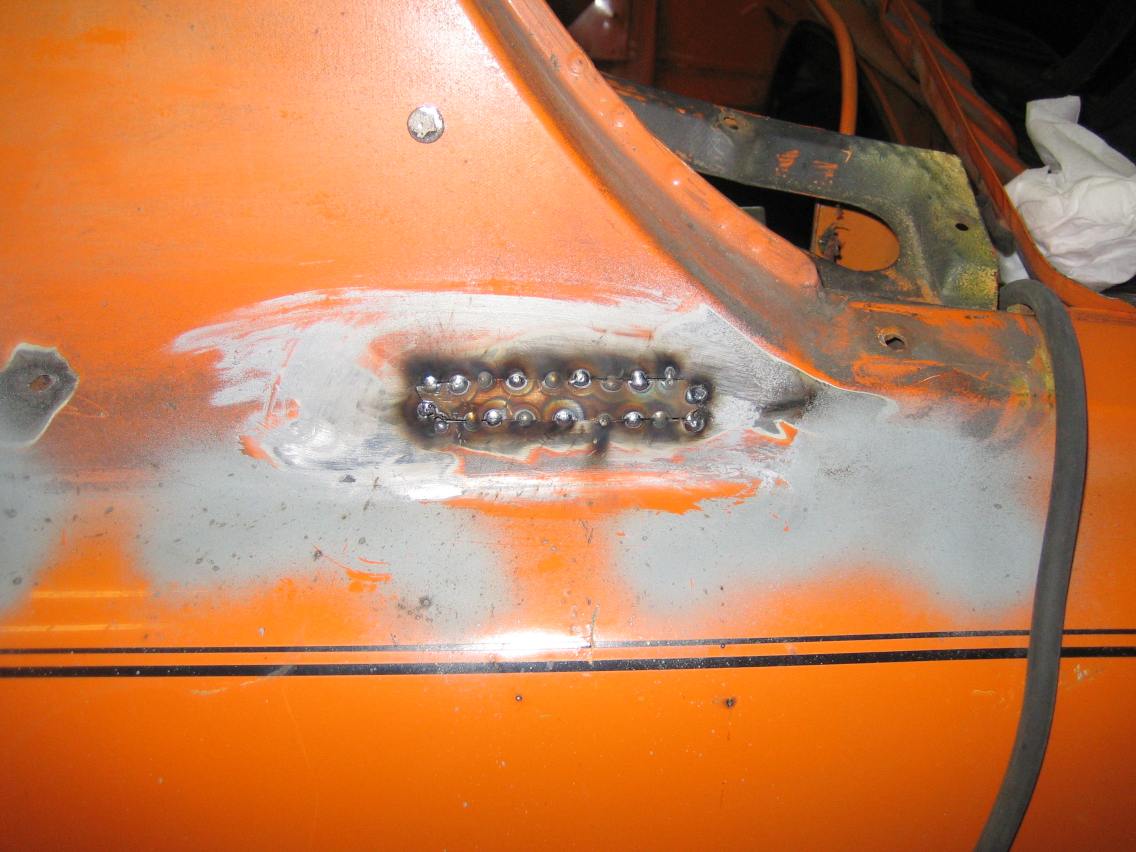
So you do not want to put too much heat into the panel and several people have written they just basically tack the perimeter rather than run a bead. Well after I have done this I think it would be better to stitch the area with small beads taking your time and moving around. Running multiple tacks leads to a multitude of pin holes that is a PIA to fix and only increases your chance of blowing holes.
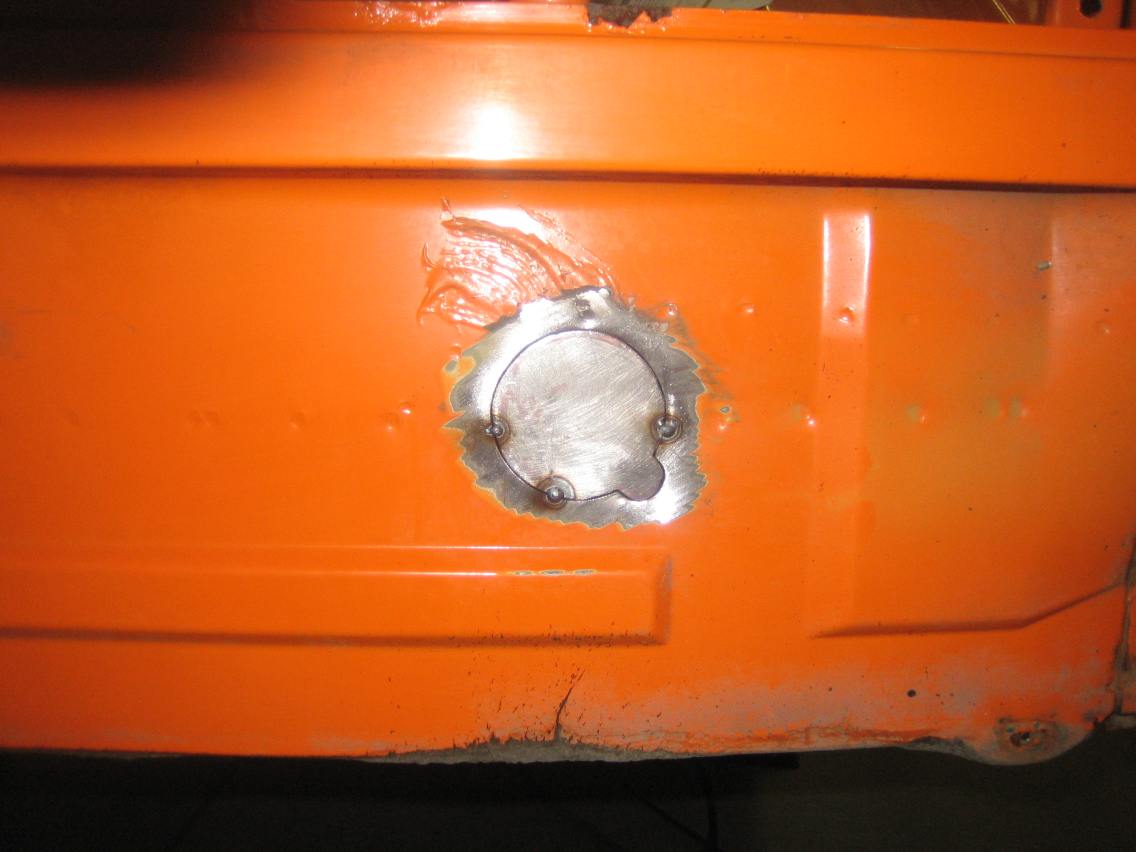
Here is the first round of tacks before grinding.
Shots of both shock mount holes after grinding down the welds.
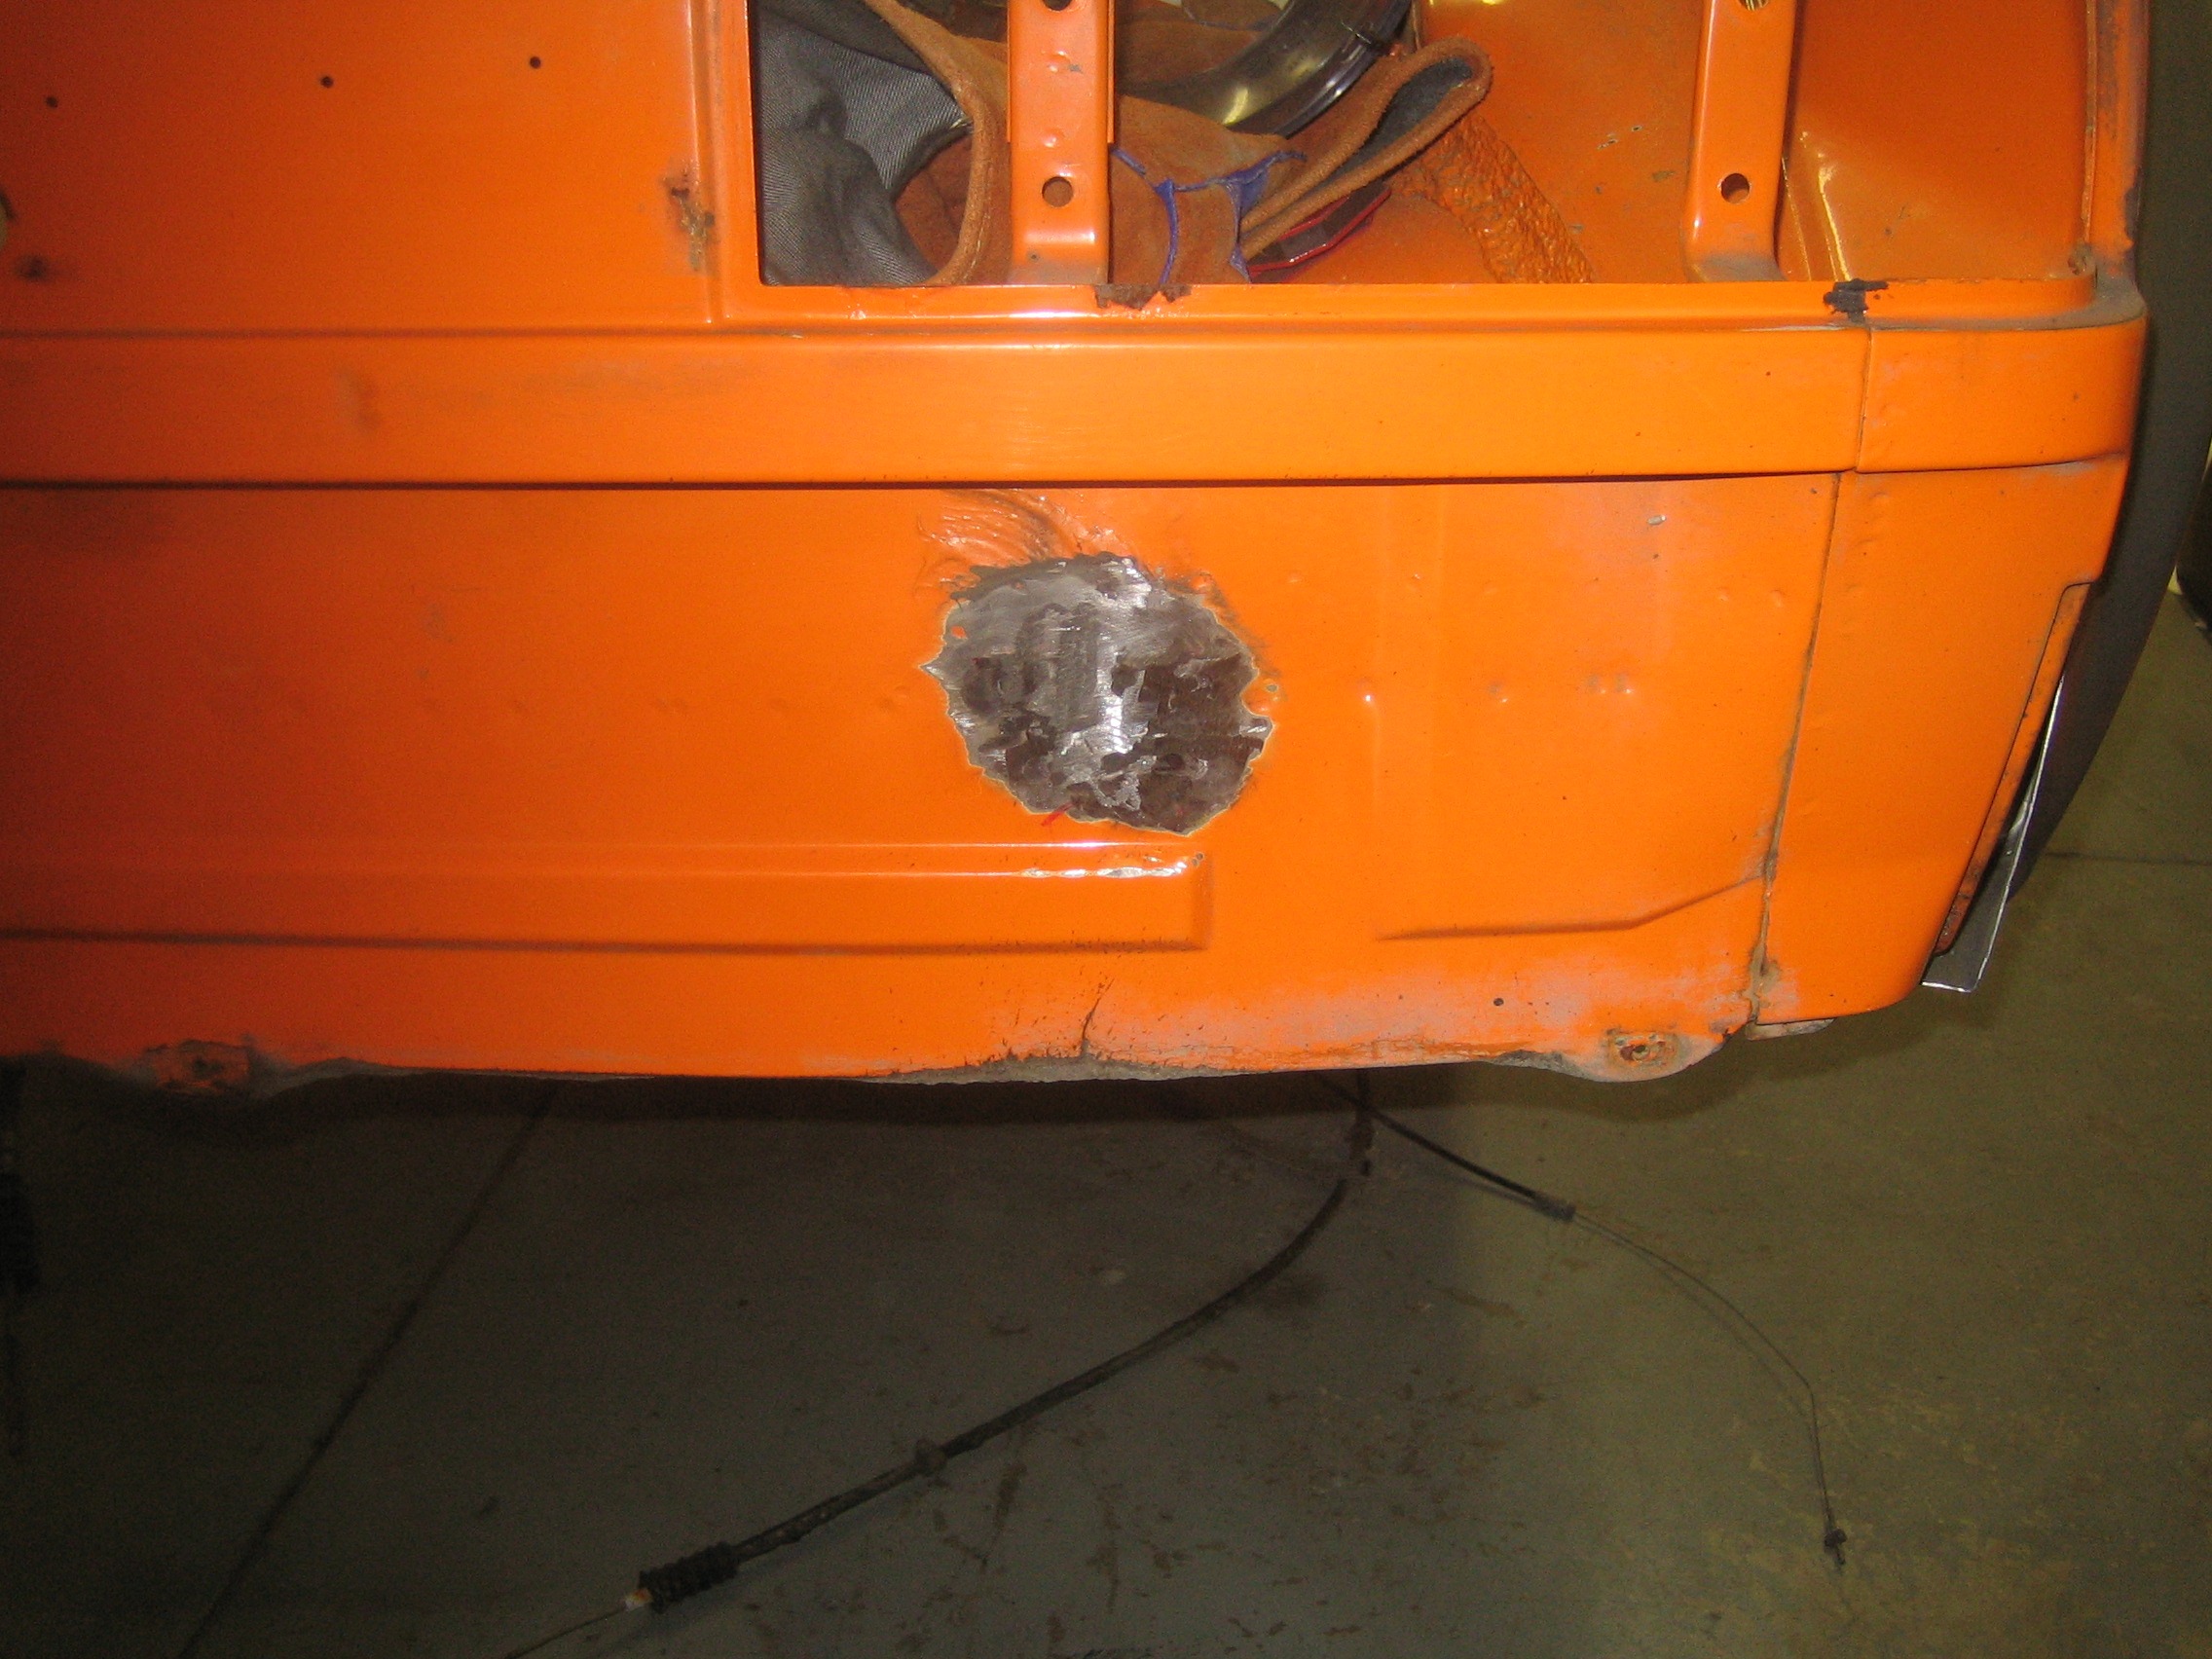
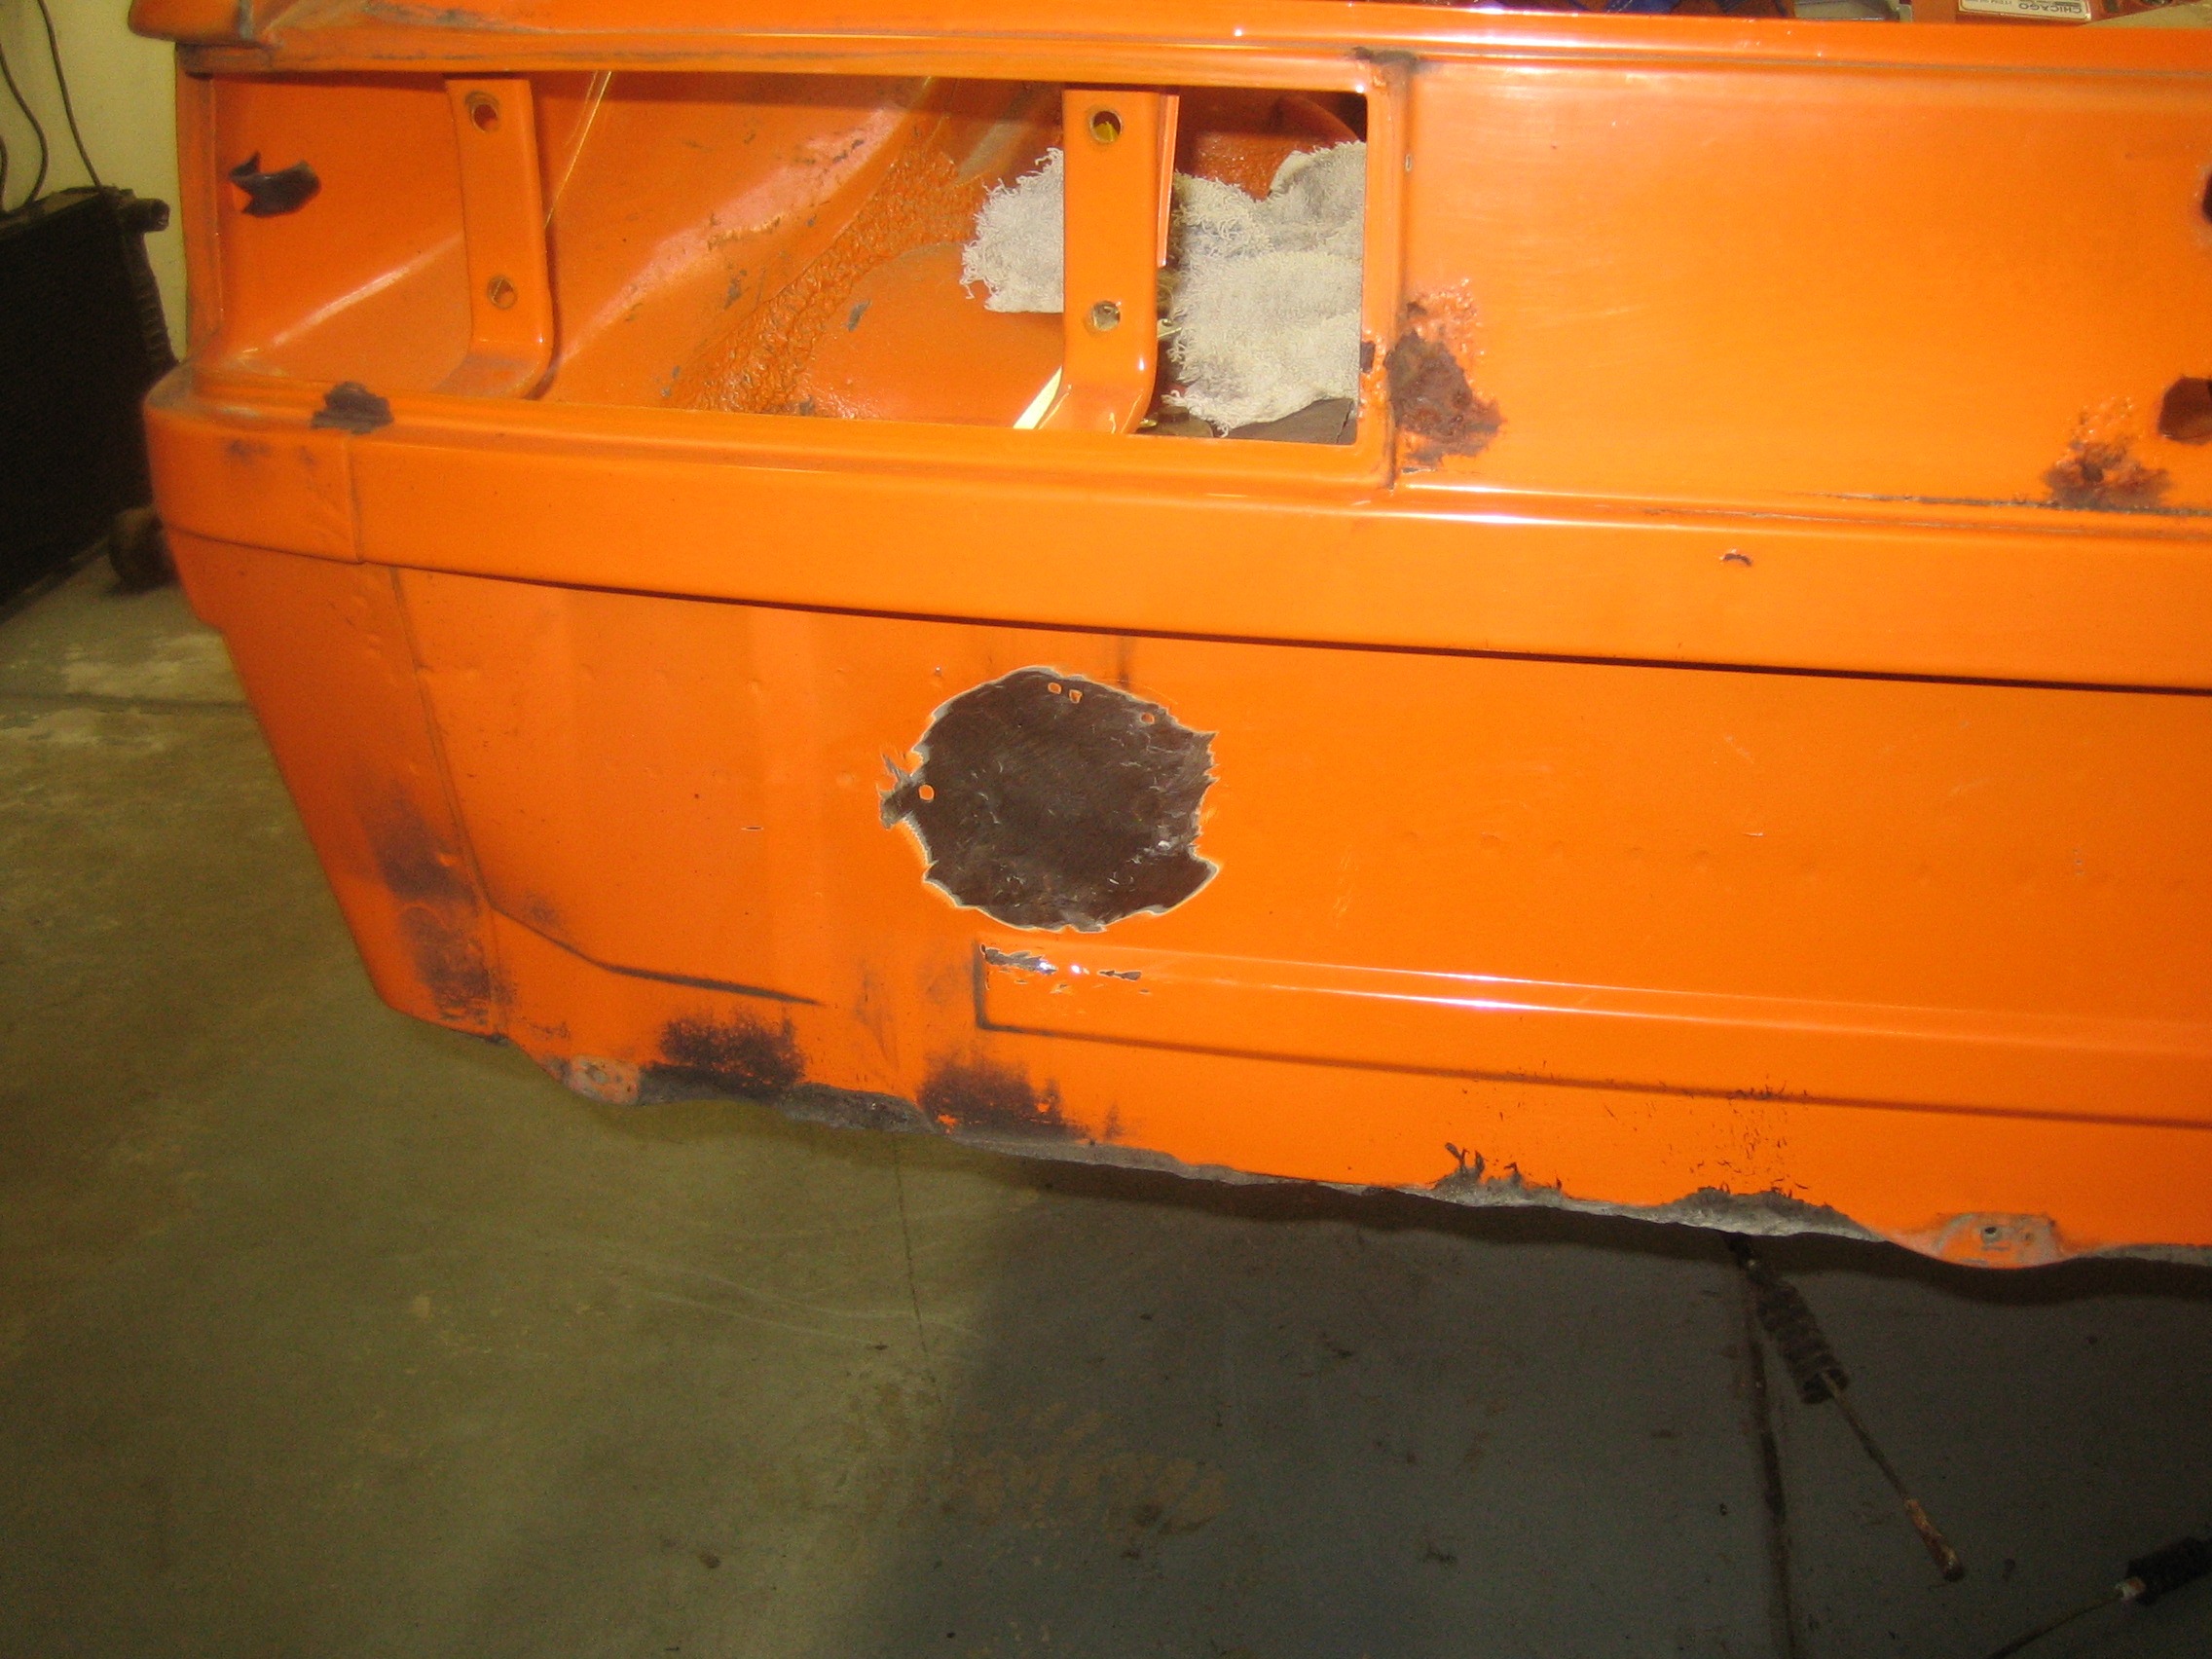
Definitely improving and the last hole took a lot less time and grinding than the first!
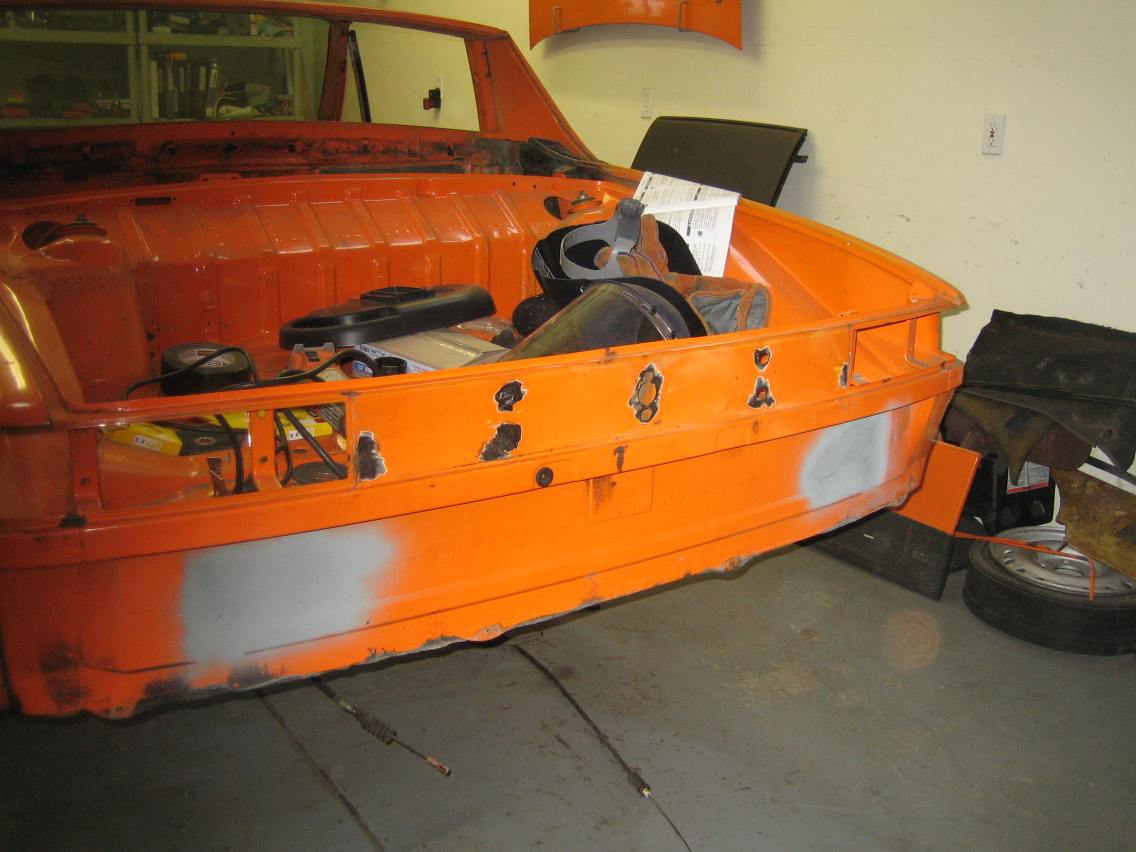
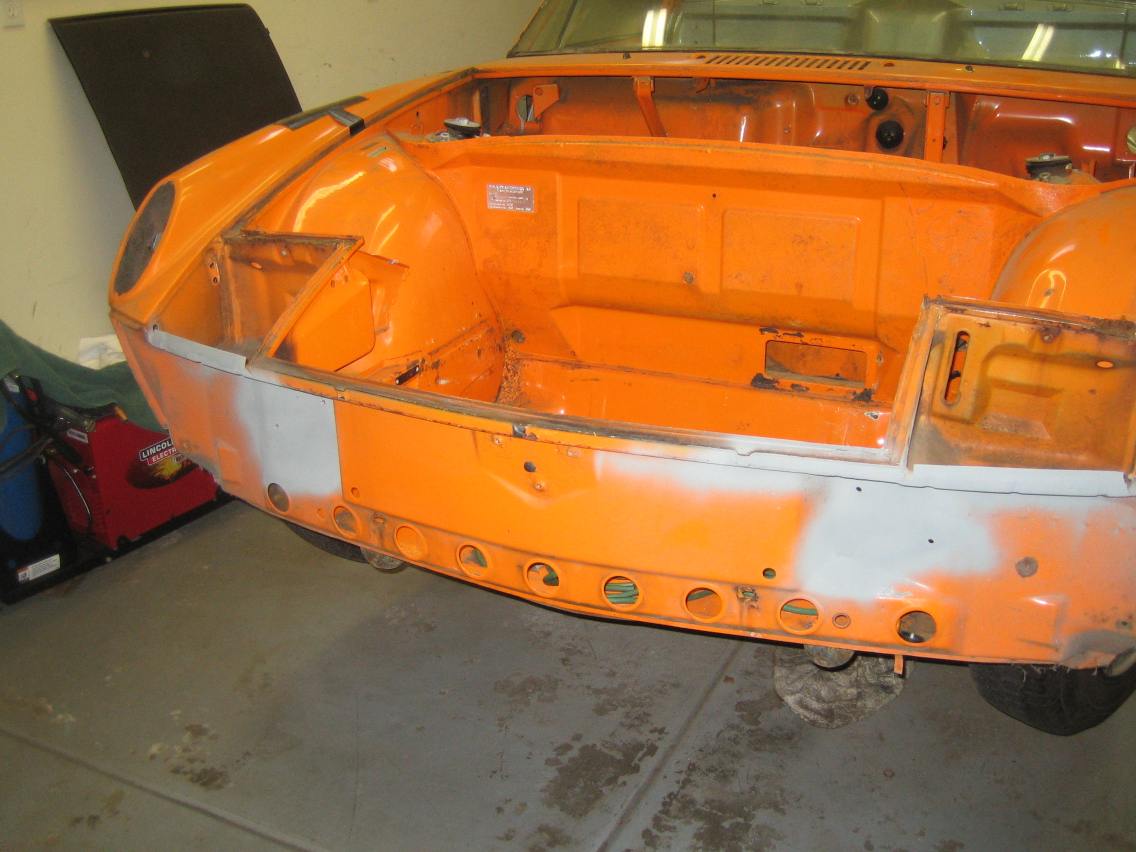
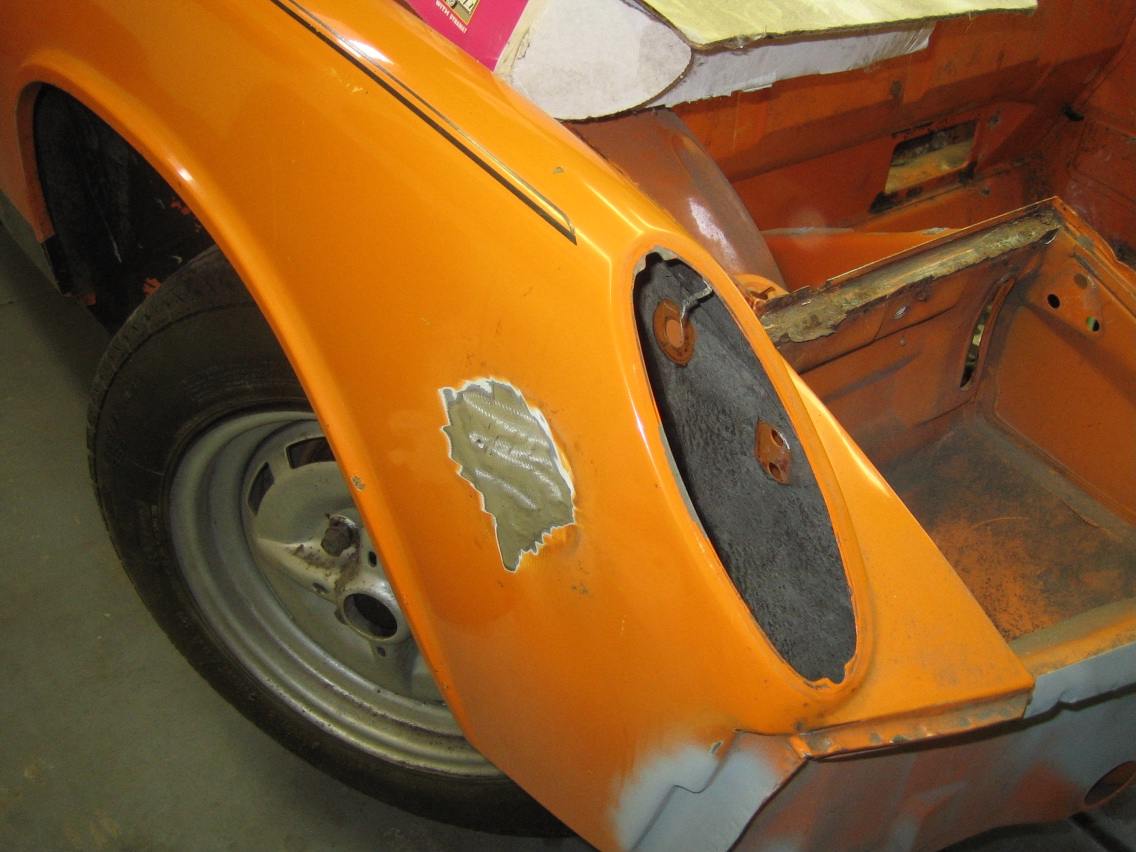
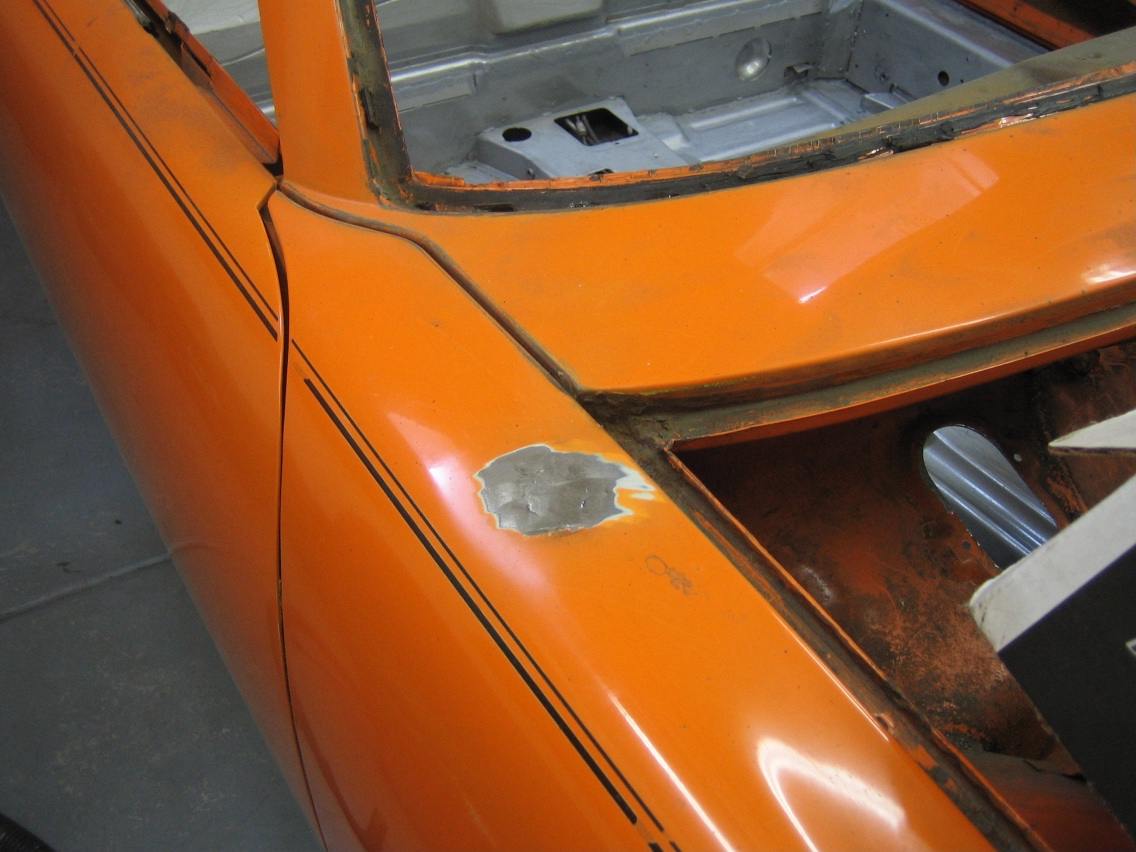
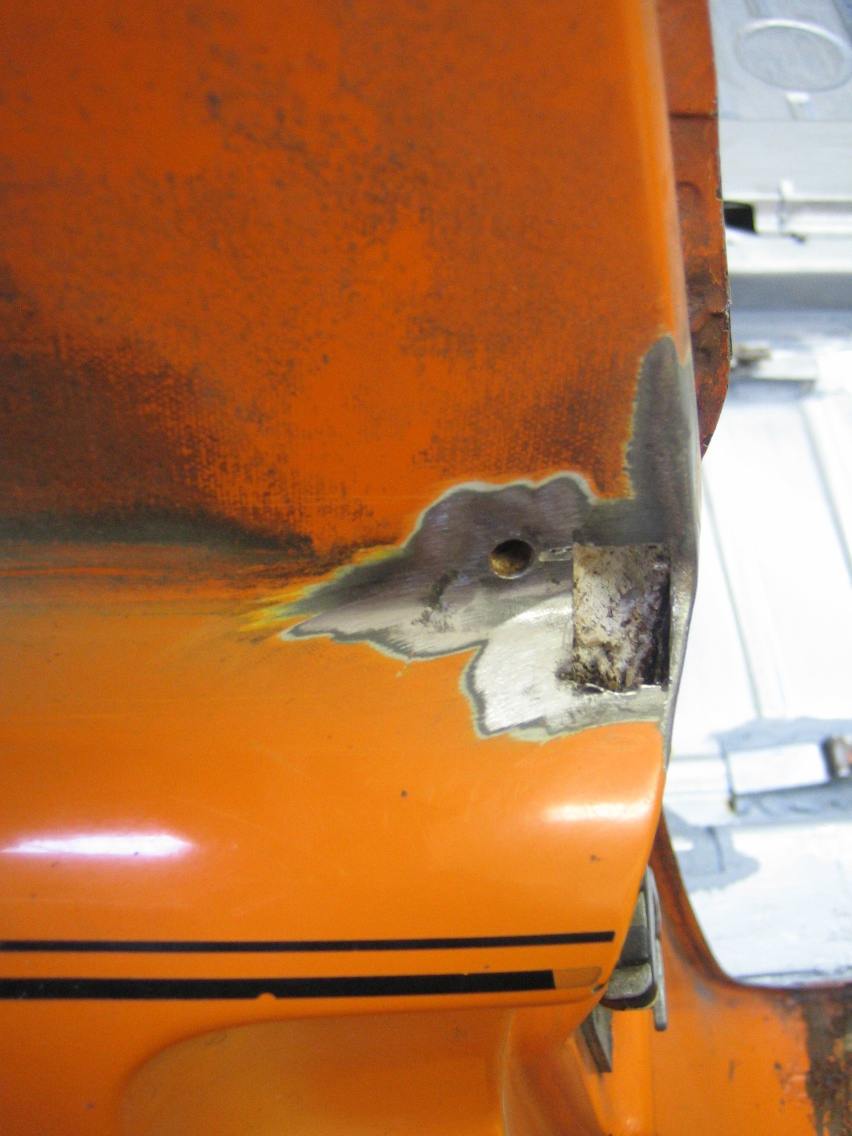
I finally got around to plugging the holes that used to hold the rear reflector and trunk lock.

With growing confidence I then tackled the front side marker holes ..
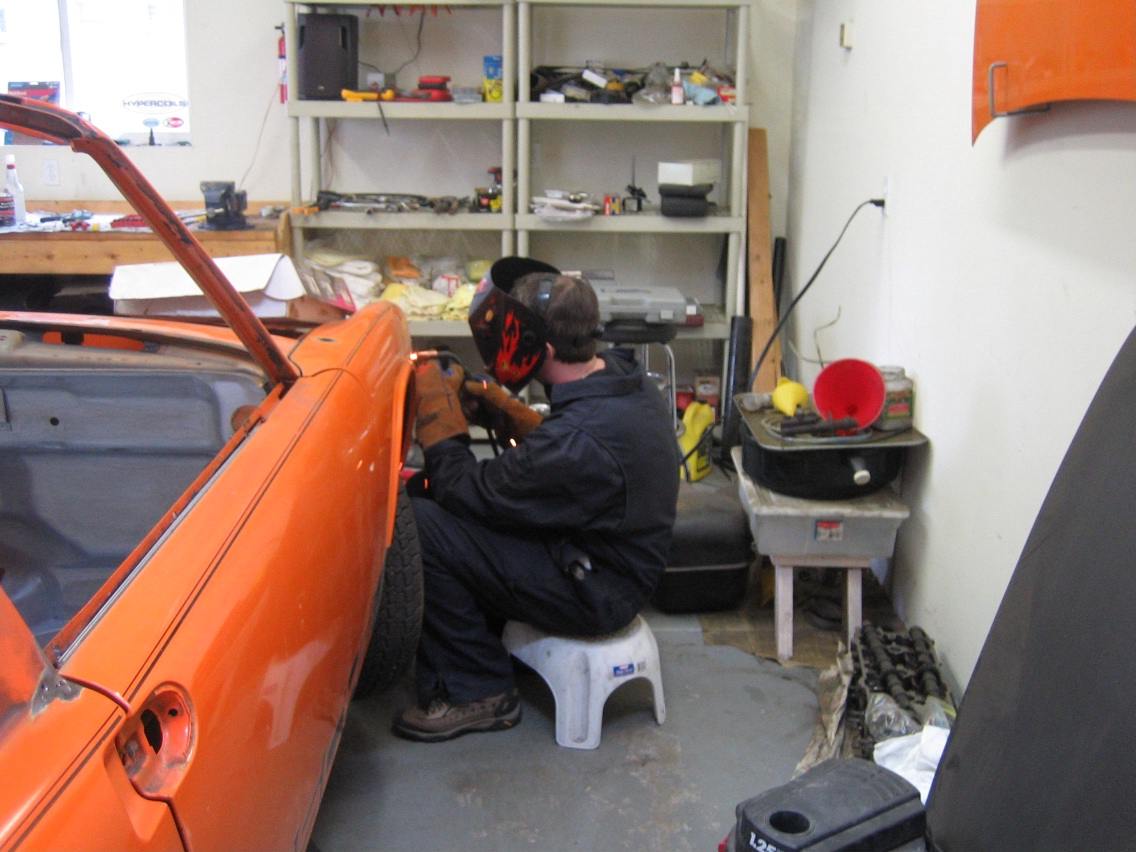
My wife managed to snap a shot while I was welding, didn't even see her, I was in the zone !!
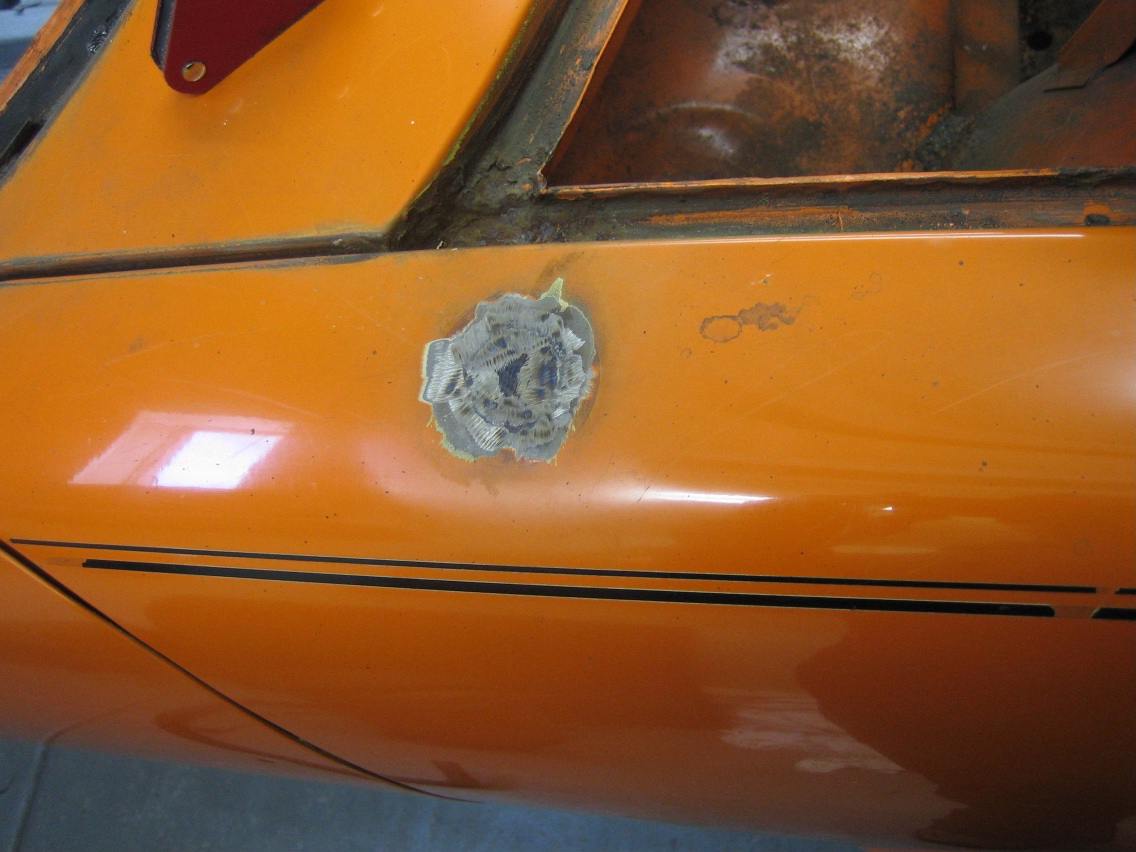
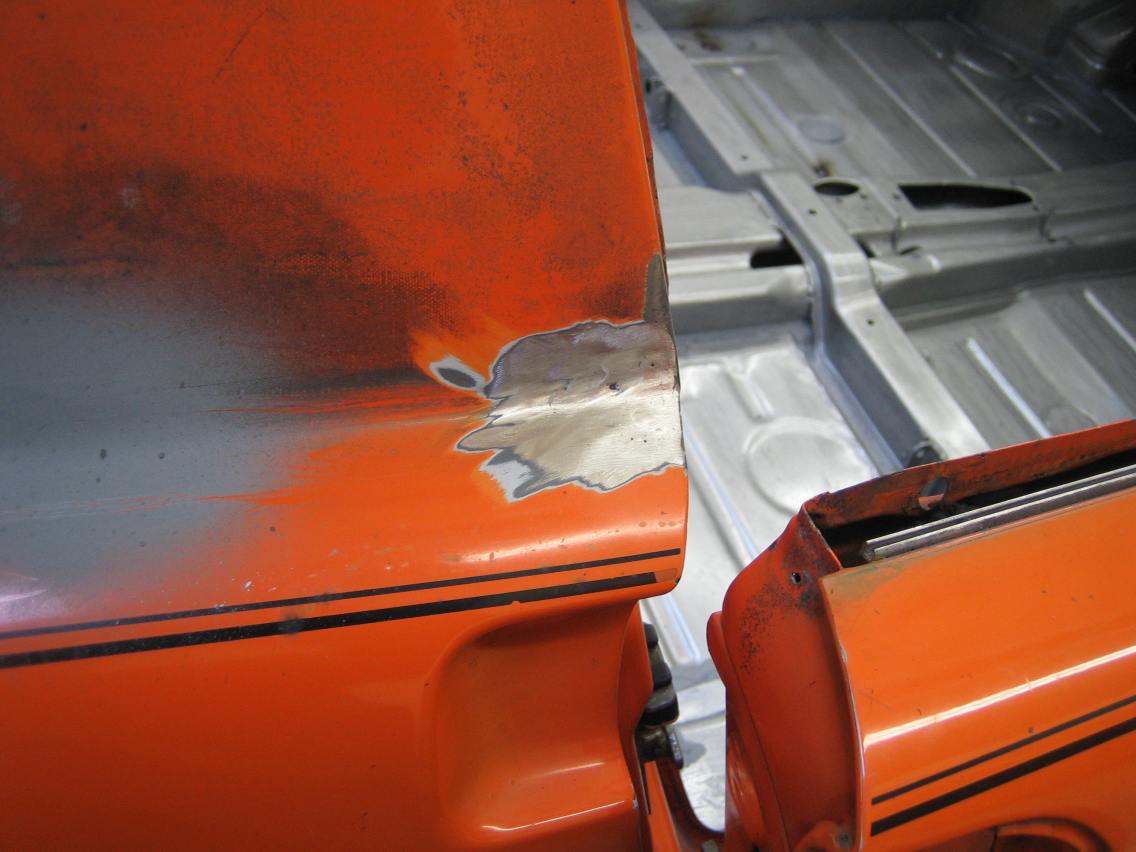
Plugged the antenna hole
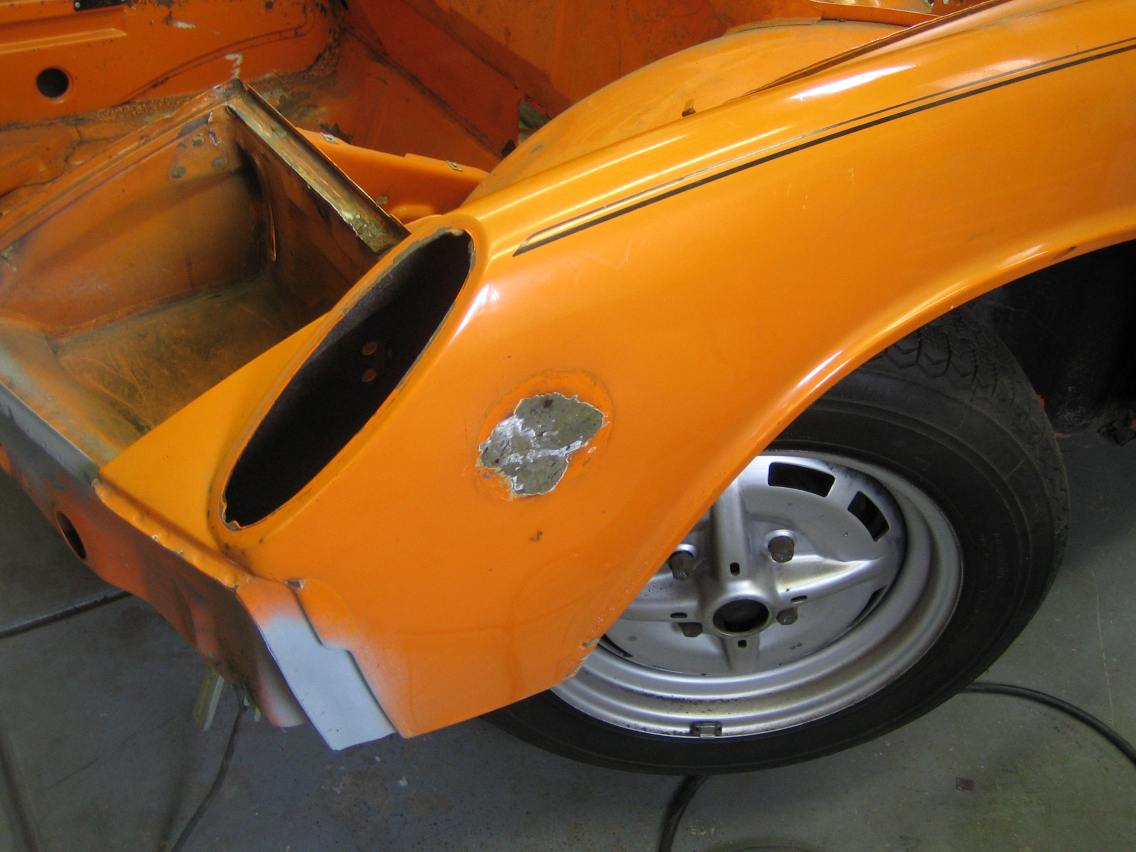
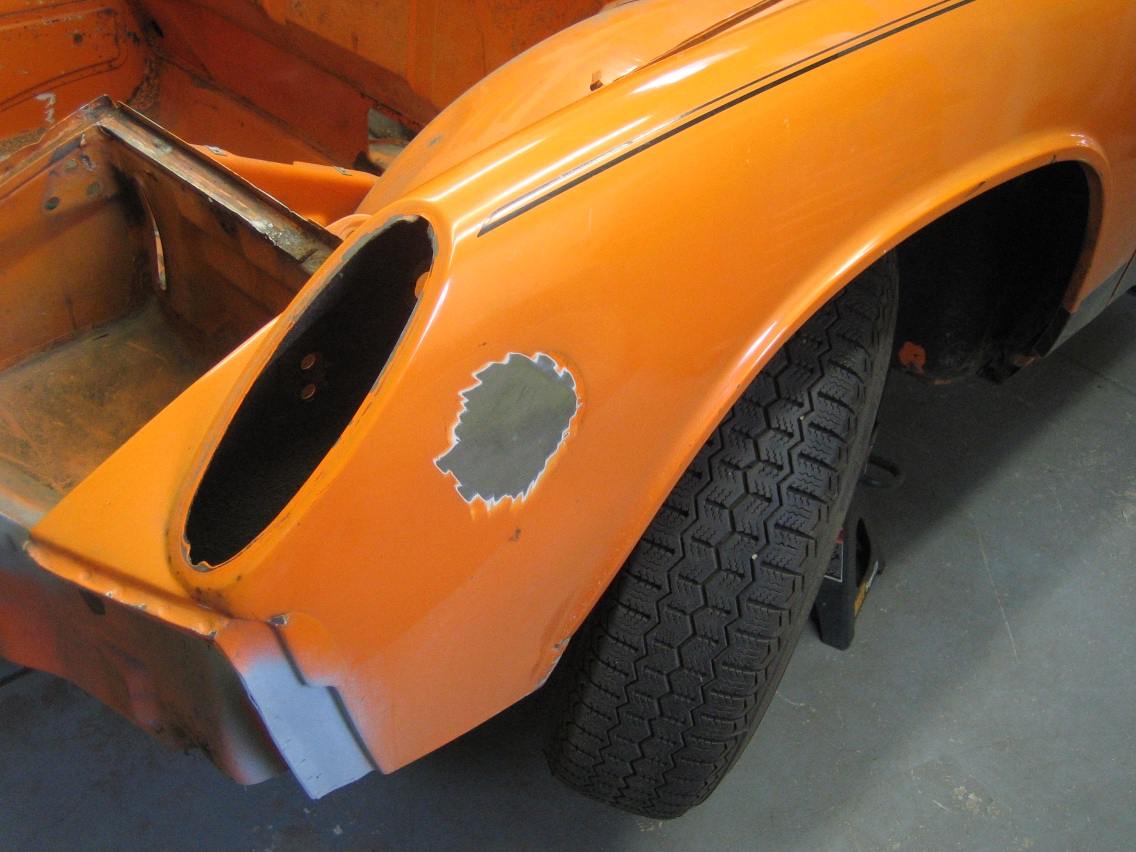
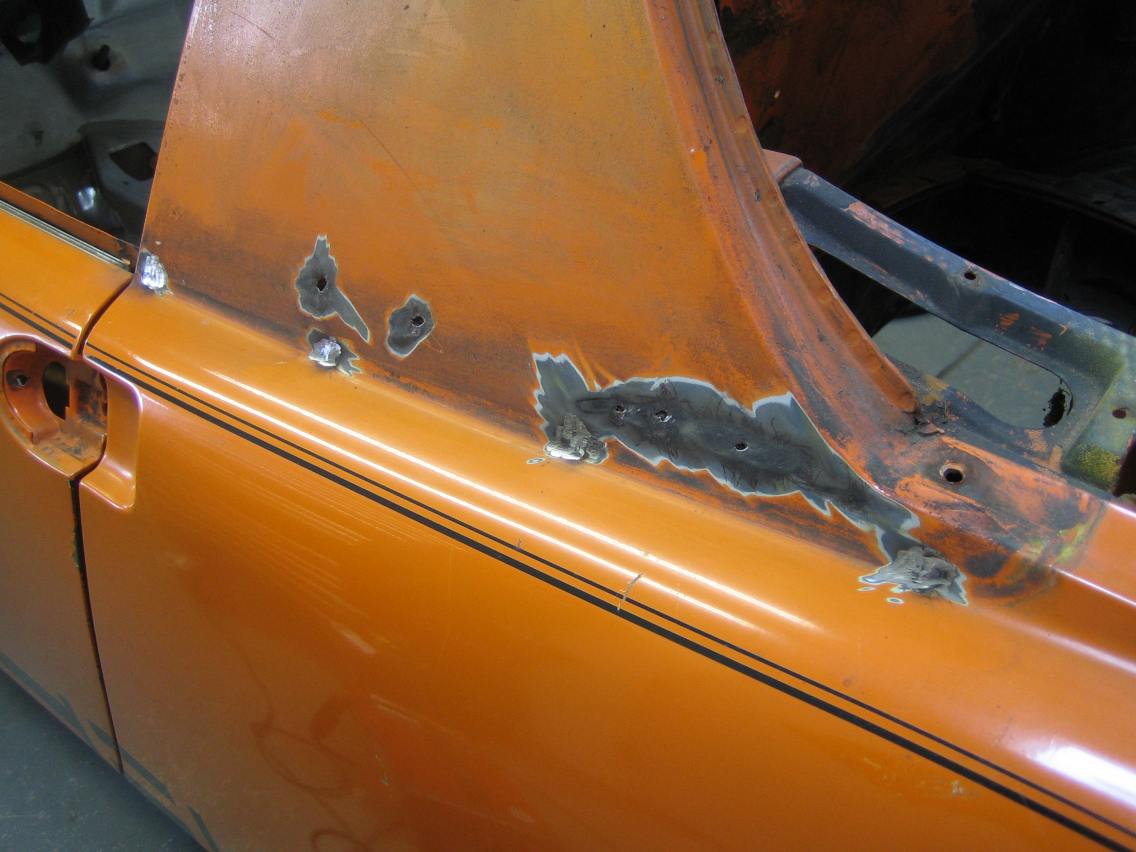
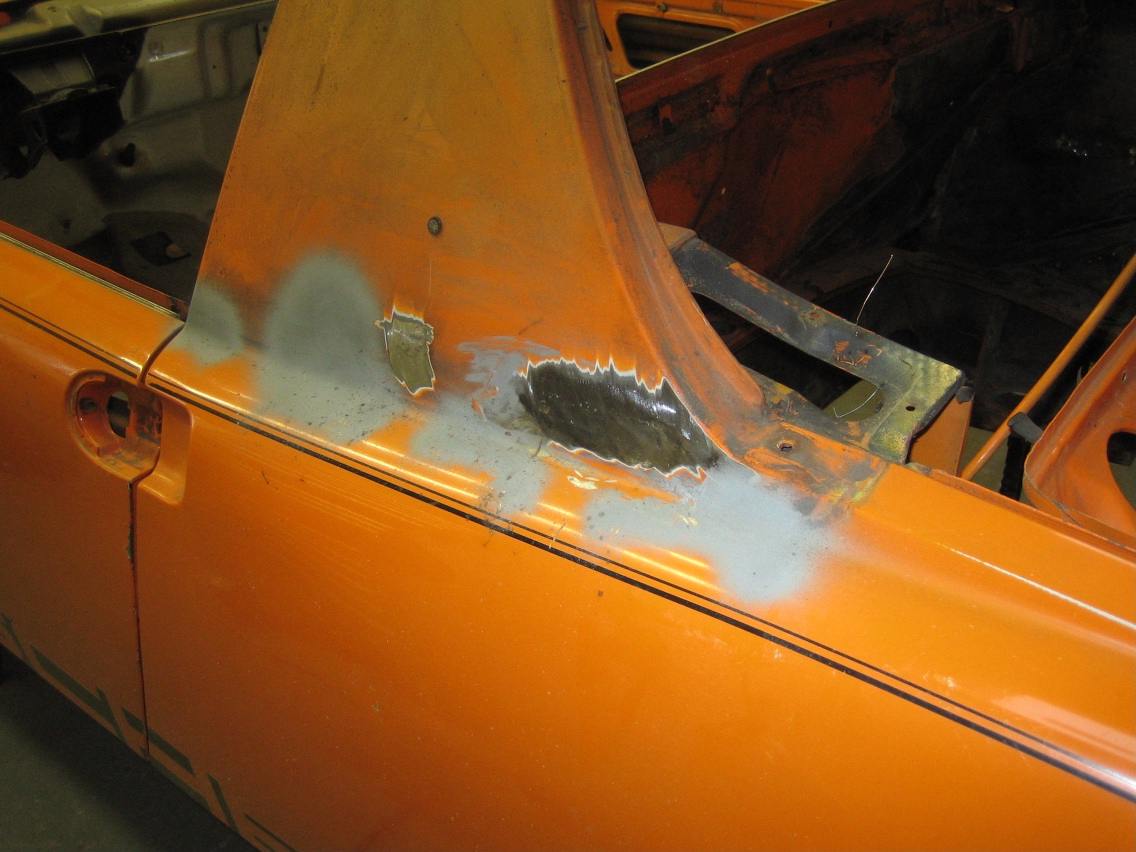
And then got to work on the sail panels, the passenger side has some rust by the door which I will do another day.
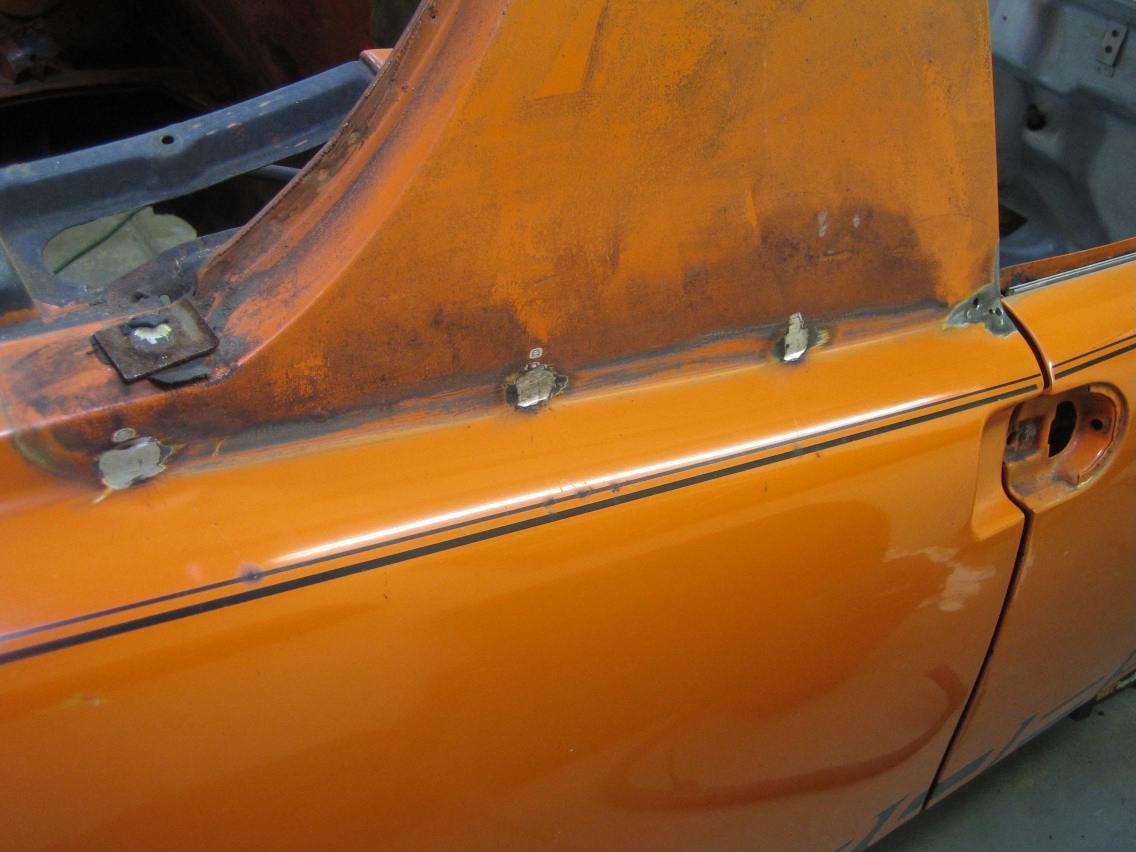
Drivers side I knew had rust as the vinyl was bubbling, I cut out the rust and welded in some good metal.
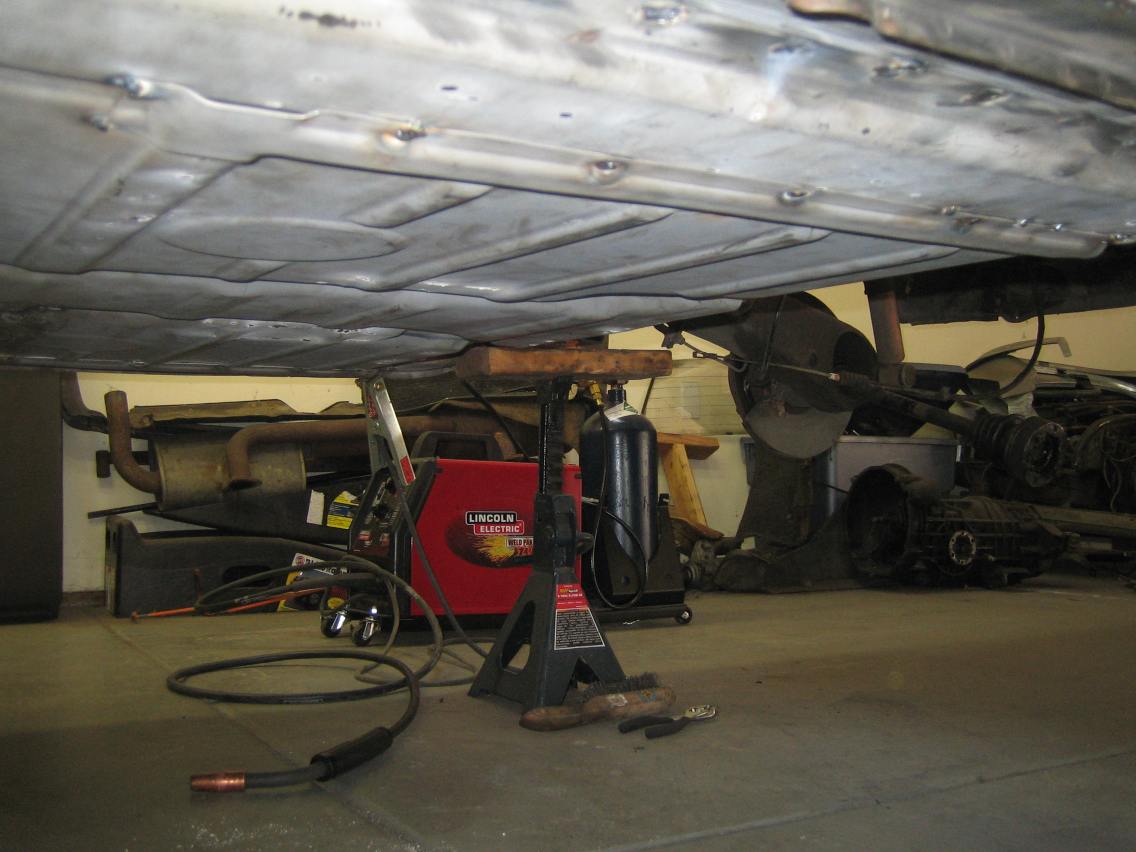
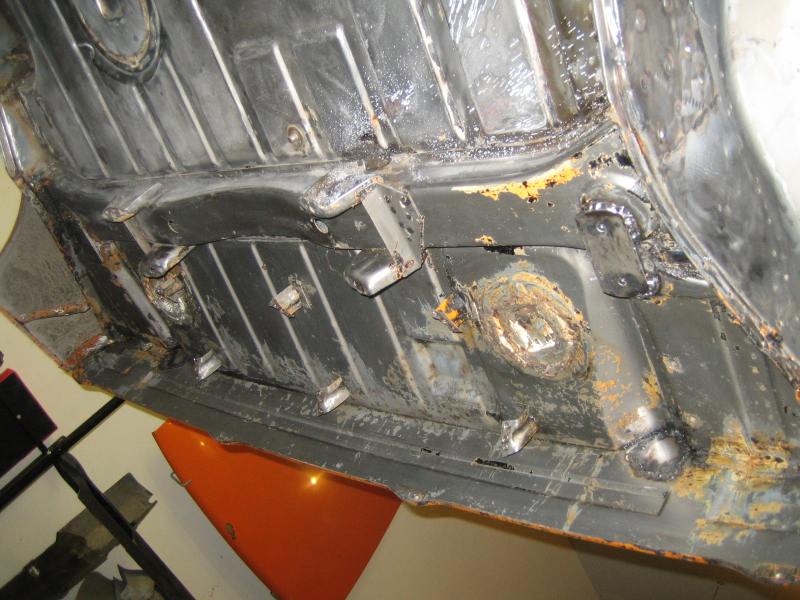
Welded the seat rail enforcements under the car today, the passenger side was not such a good fit, the rail covered both old and new whereas the drivers side covered just new. I punched holes so I could plug weld to the pan.
Back to the passenger sail panel, once I cut out the offending area it was full of seal seamer and there was plenty of it, enough to ensure that water did not come from the wheel well. It came from the neighboring hole for the sail panel trim, something to be said for having a car without the trim.
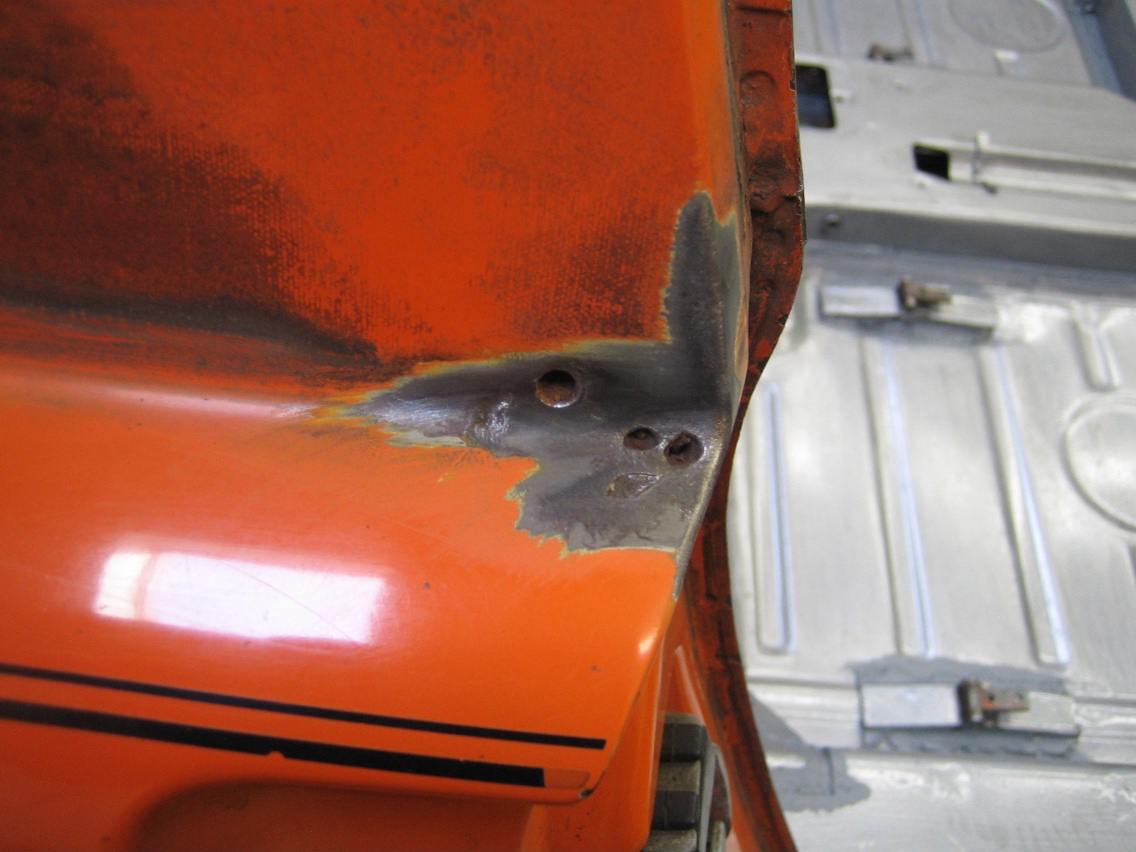
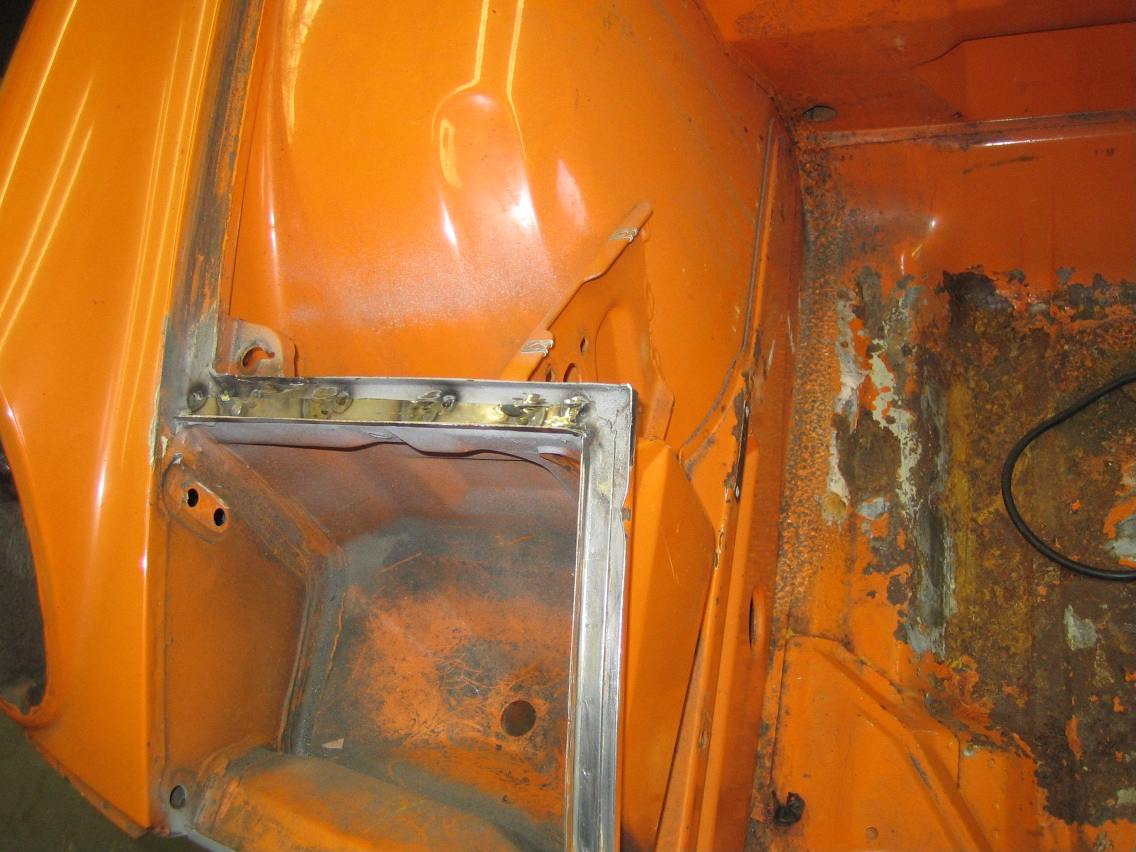
Fixed some rusted areas around the headlight buckets, from what I have seen virtually all 914's have an issue here. I just cut out the bad metal, made some templates and cut new metal and welded.
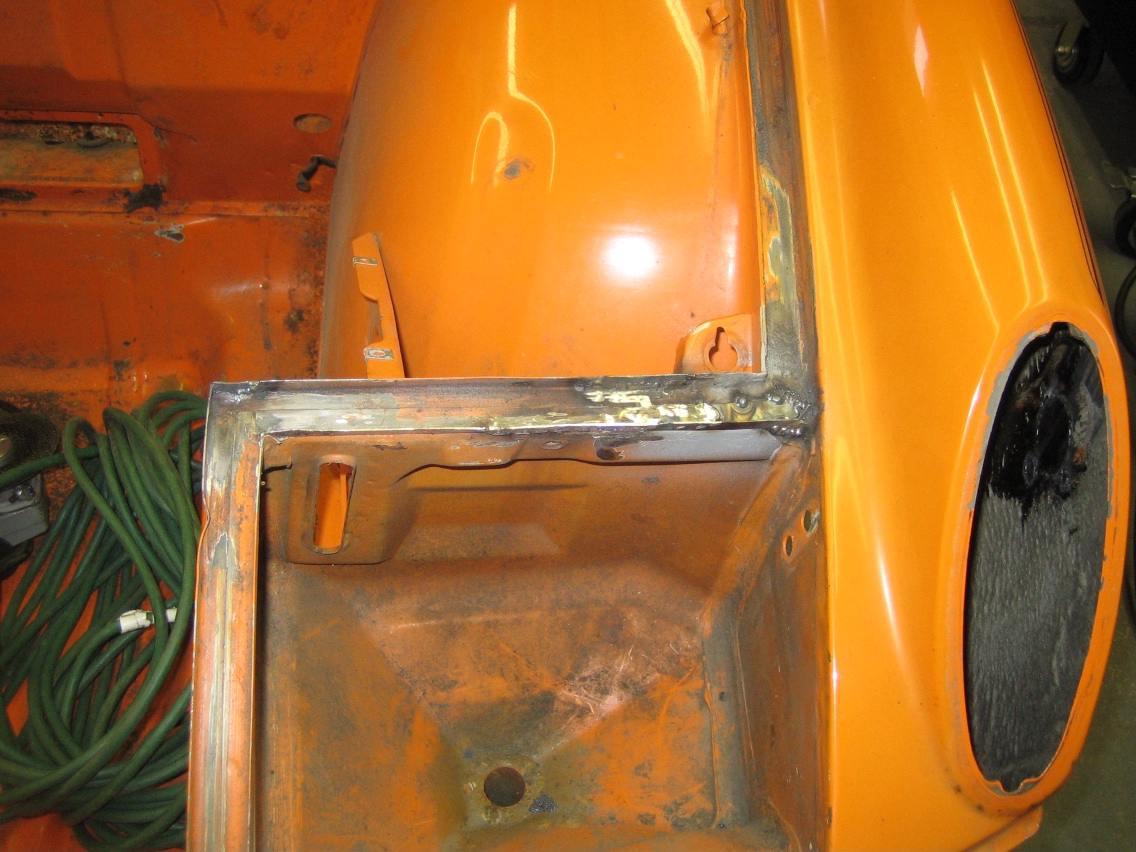
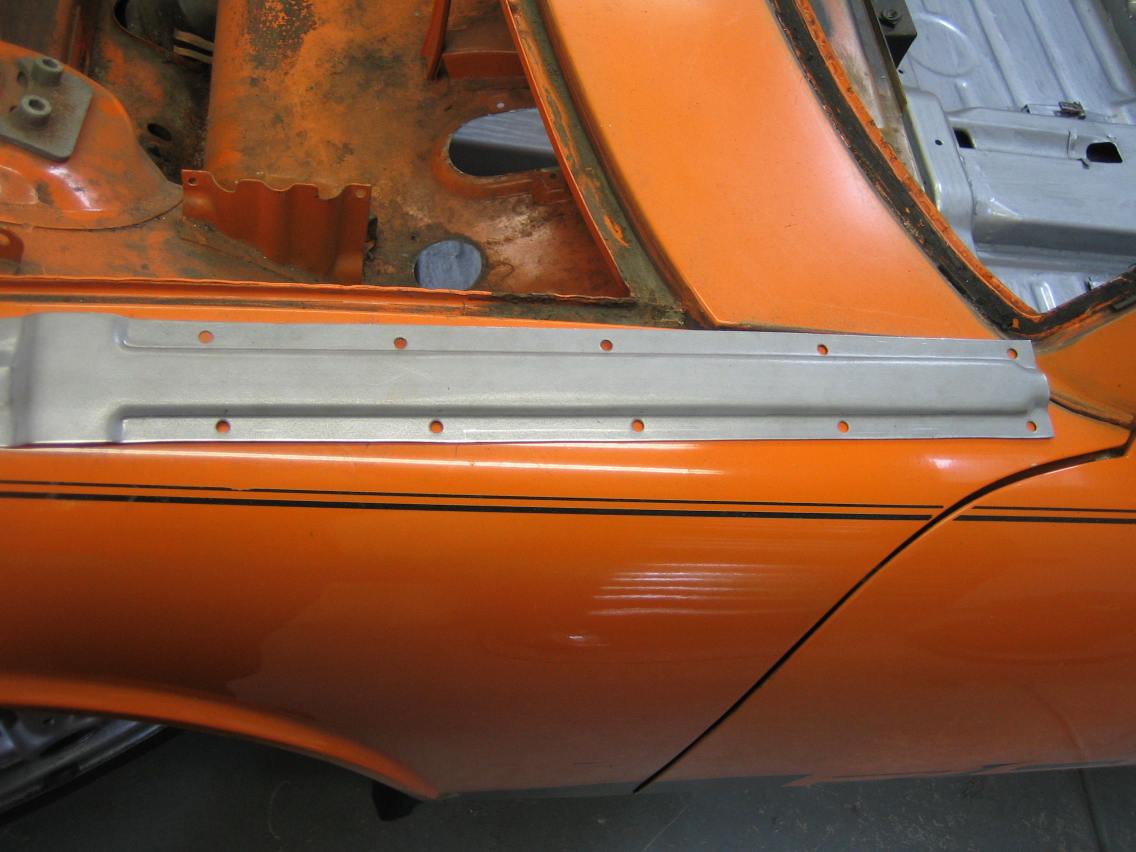
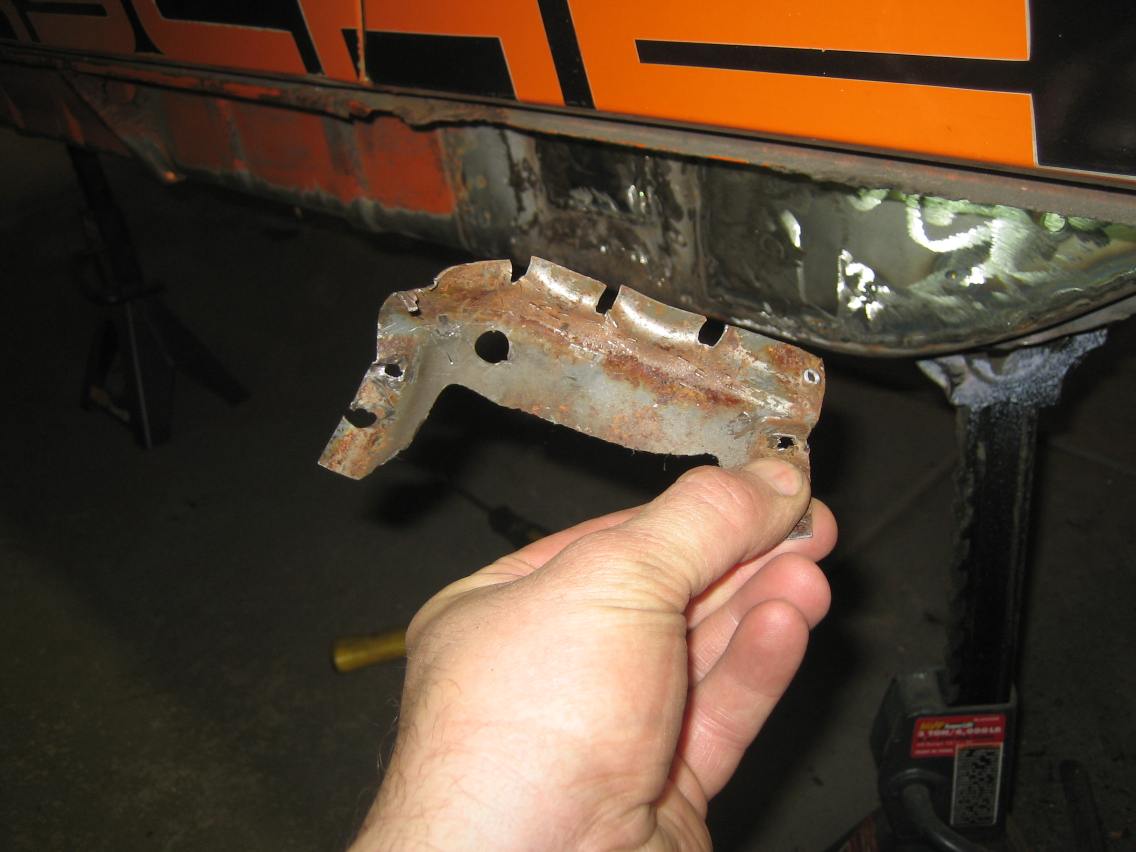
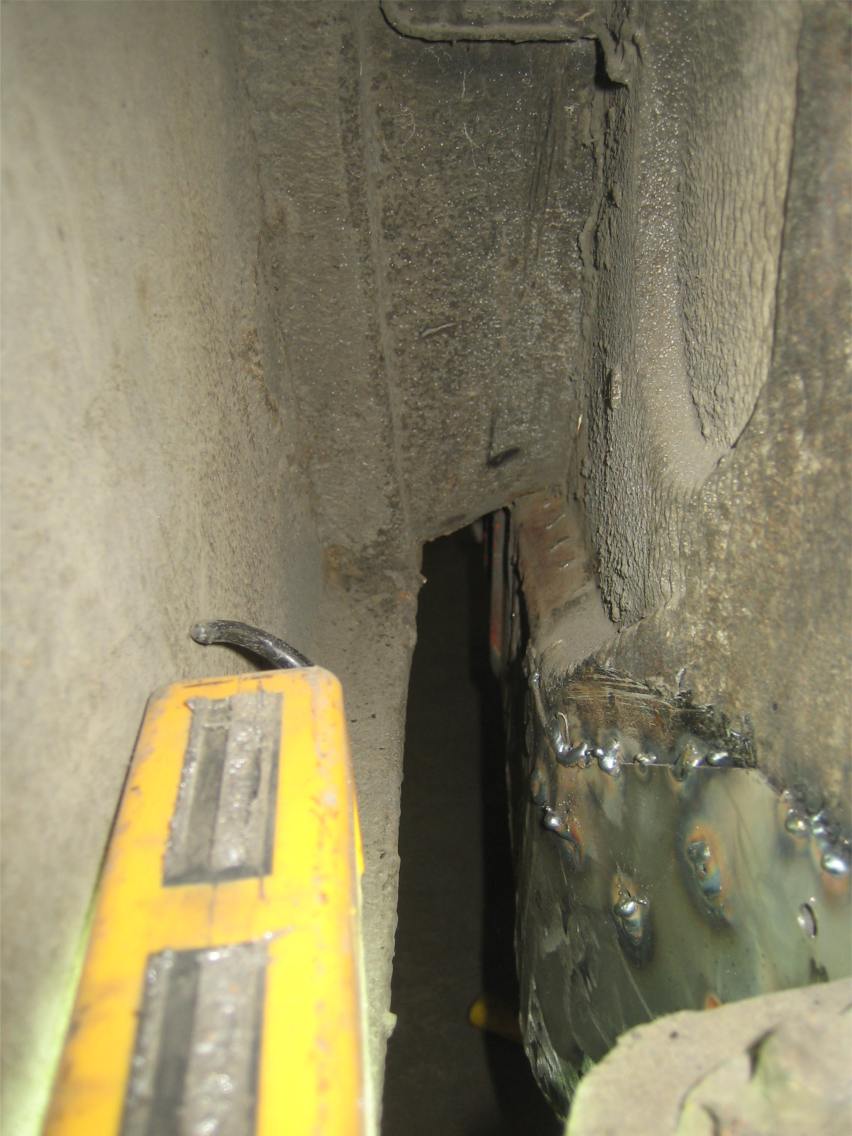
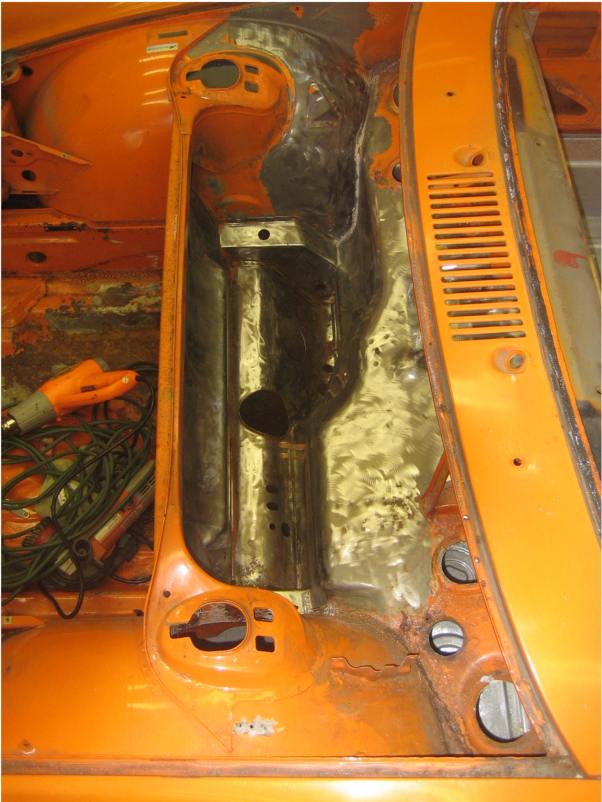
Both of the jack tubes were toast, new parts are easy to come by and inexpensive but removing the old parts take some work. You can see on the 2nd photo that the metal on the rocker is turn.
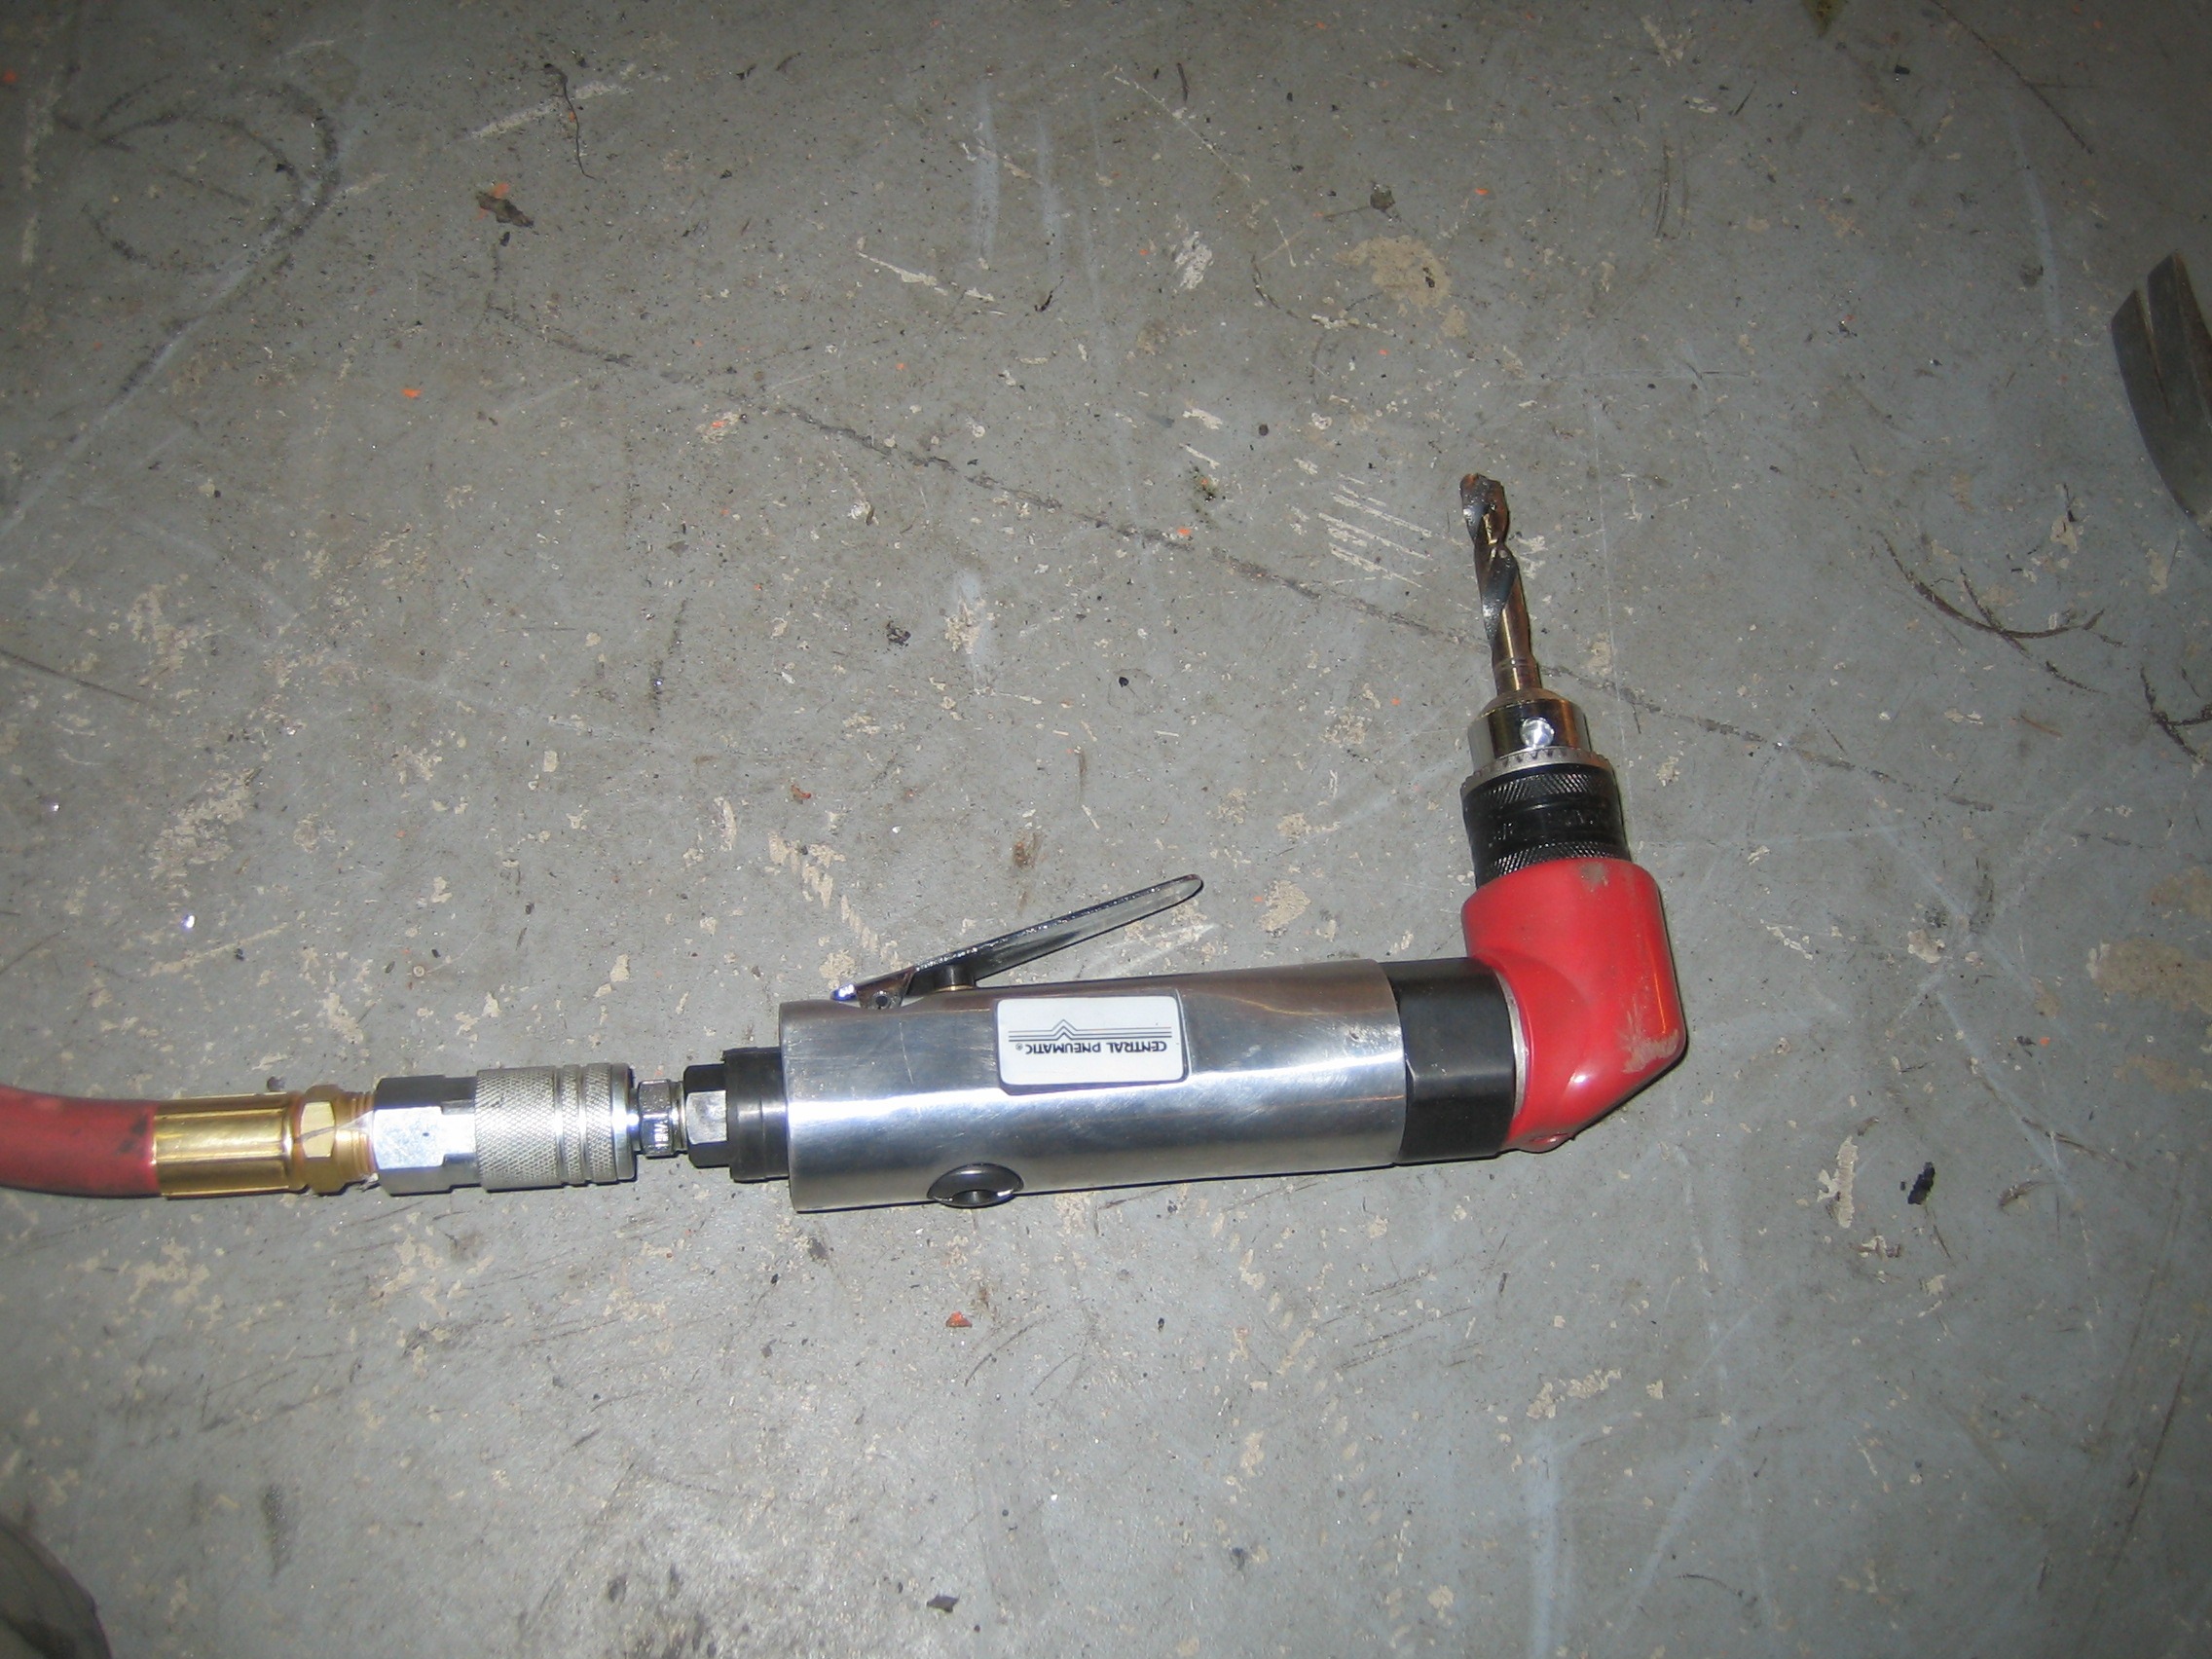
So I bought a right angled drill which allowed me to get to most of the welds inside the wheel well, the one I could not get I convinced to let go. The remnants will need to be ground down but no biggie, I welded a piece of metal over the damaged area and am still undecided on whether I will do the delete option or put the new parts on.
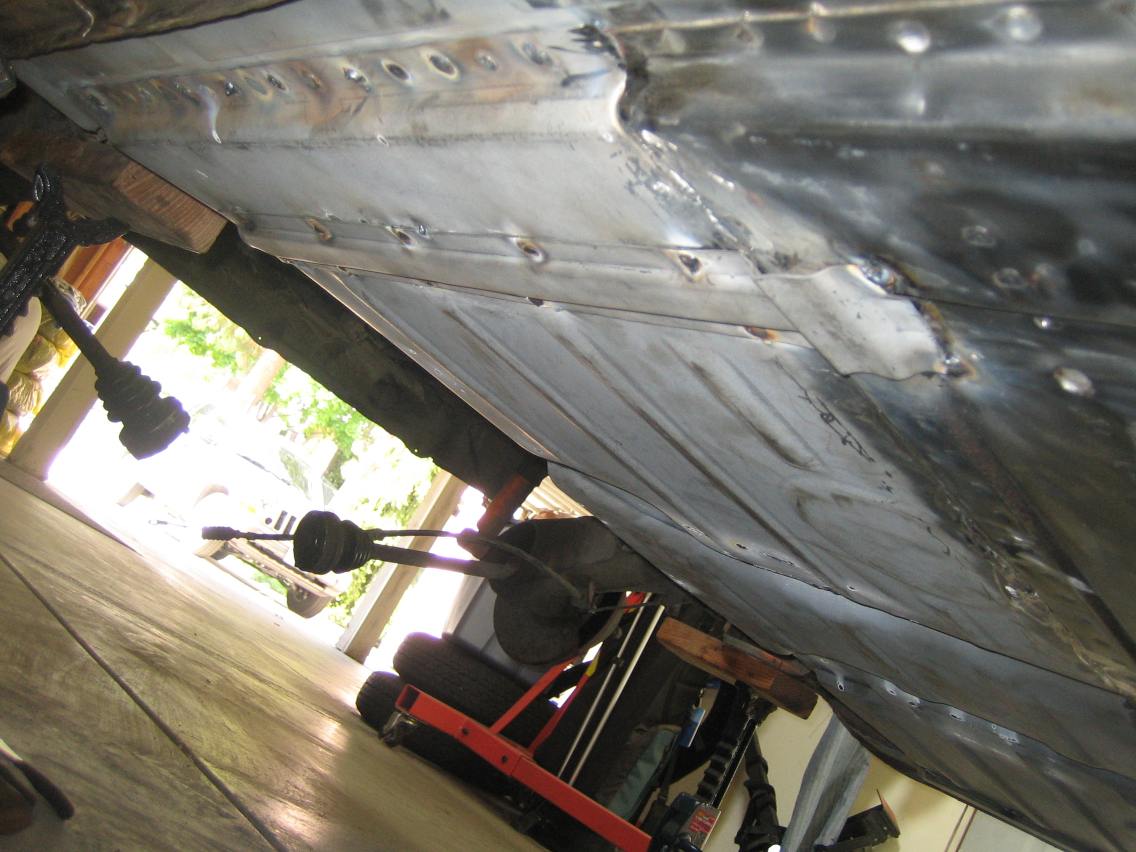
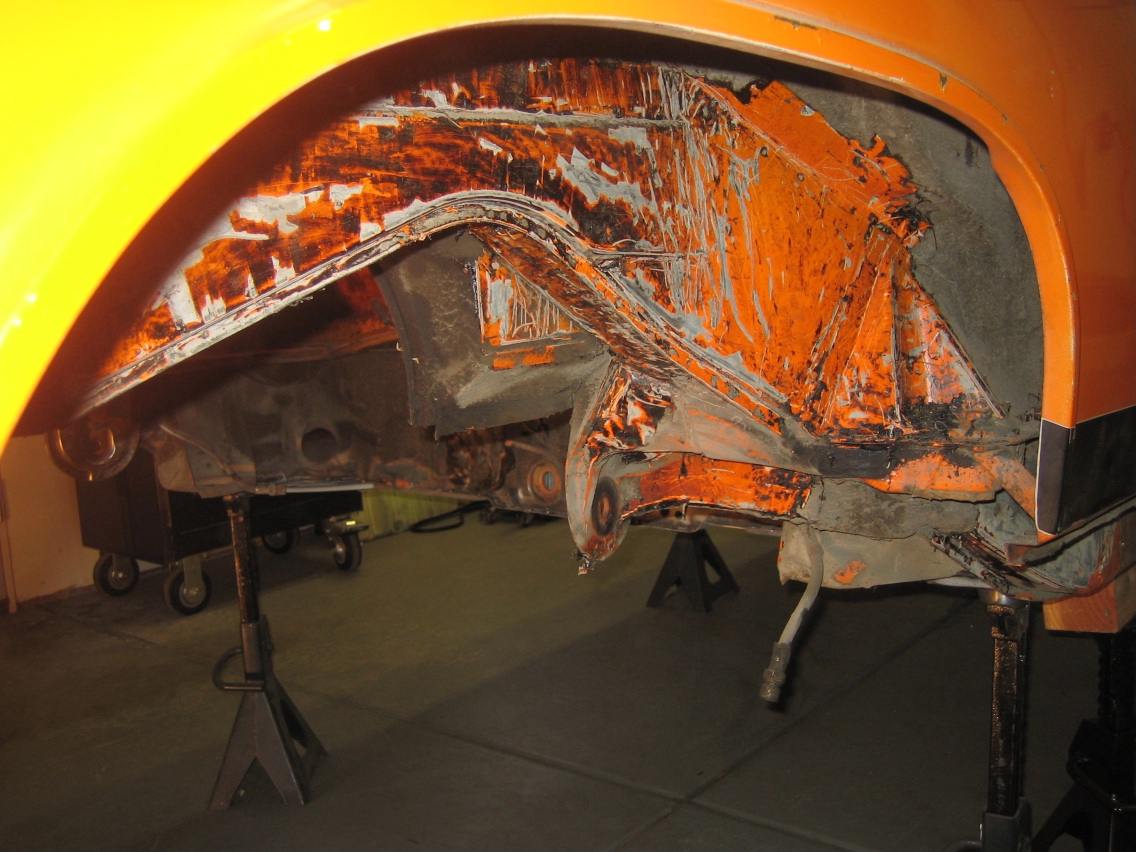
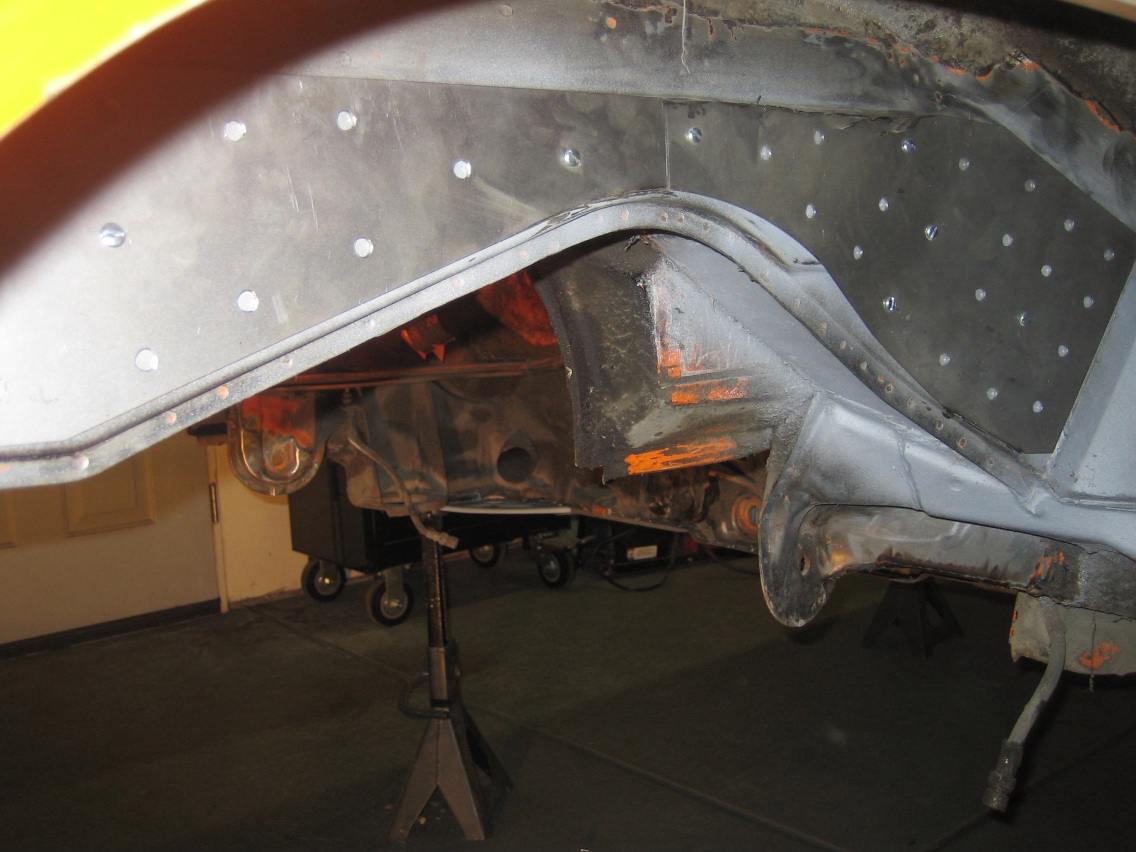
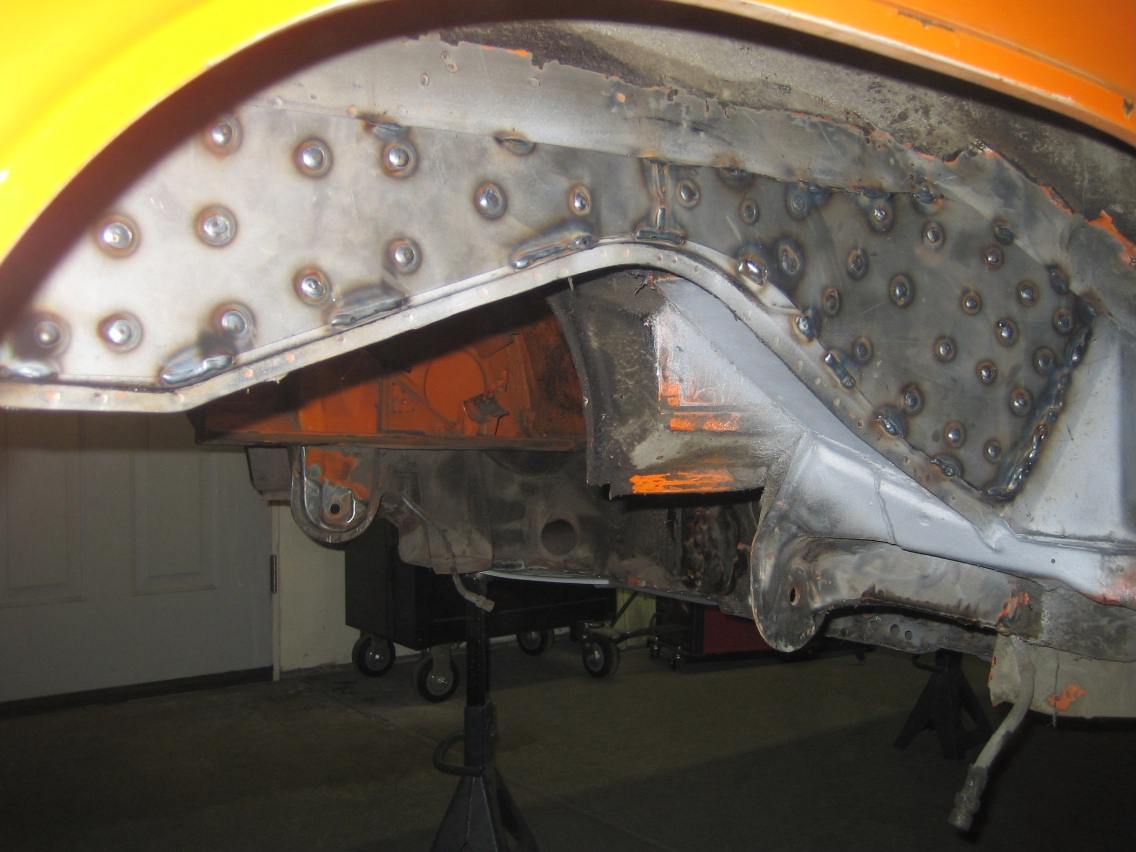
OK onto the GT stiffening kit, ordered the metal from Ebay but the parts needed a fair bit of trimming in order to get them to fit, maybe they were made for an earlier model or something. Removing the underseal was a pain, I found a heat gun and scraper to be the best method and then some spray on citrus paint remover to get down to bare metal.
The 2nd side (passenger) went better than the 1st as I got better and getting the metal to fit snugly using more screws.
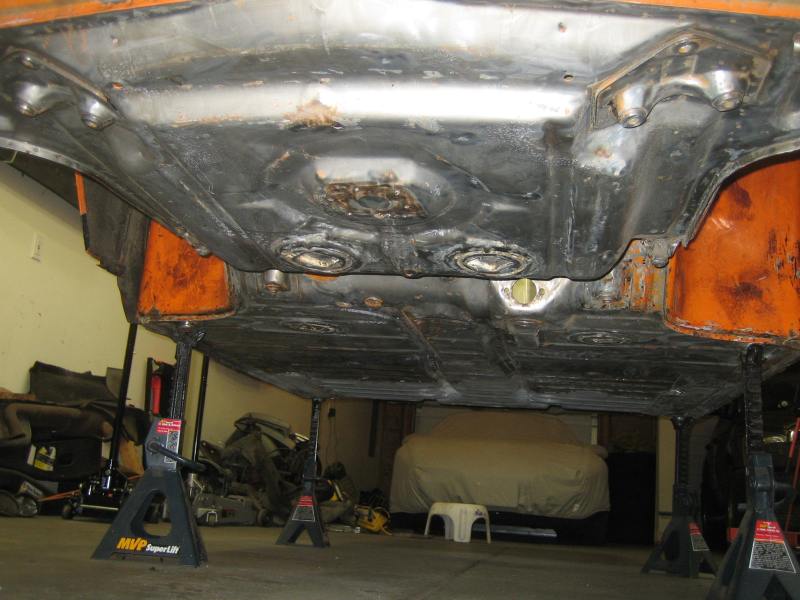
I decided to completely strip the underside, I thought it was in pretty good shape but closer inspection showed the underseal to be very easy to remove in places. In other areas it is great but WYAIT syndrome came over me and why leave it, my thoughts are Epoxy primer followed by a tintatable bed liner.
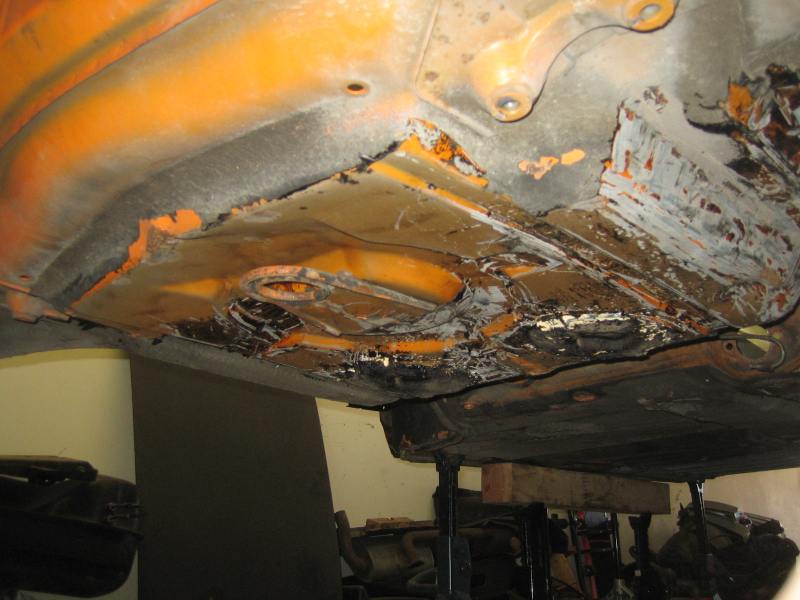
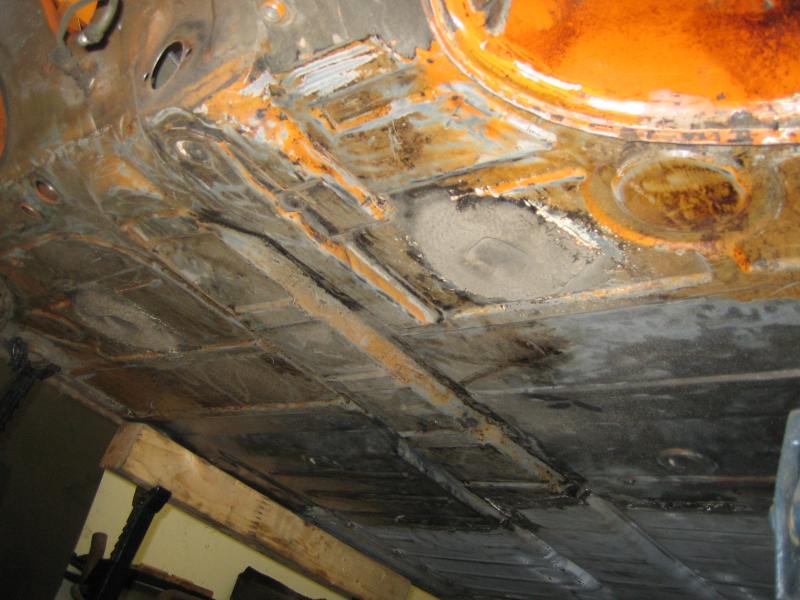
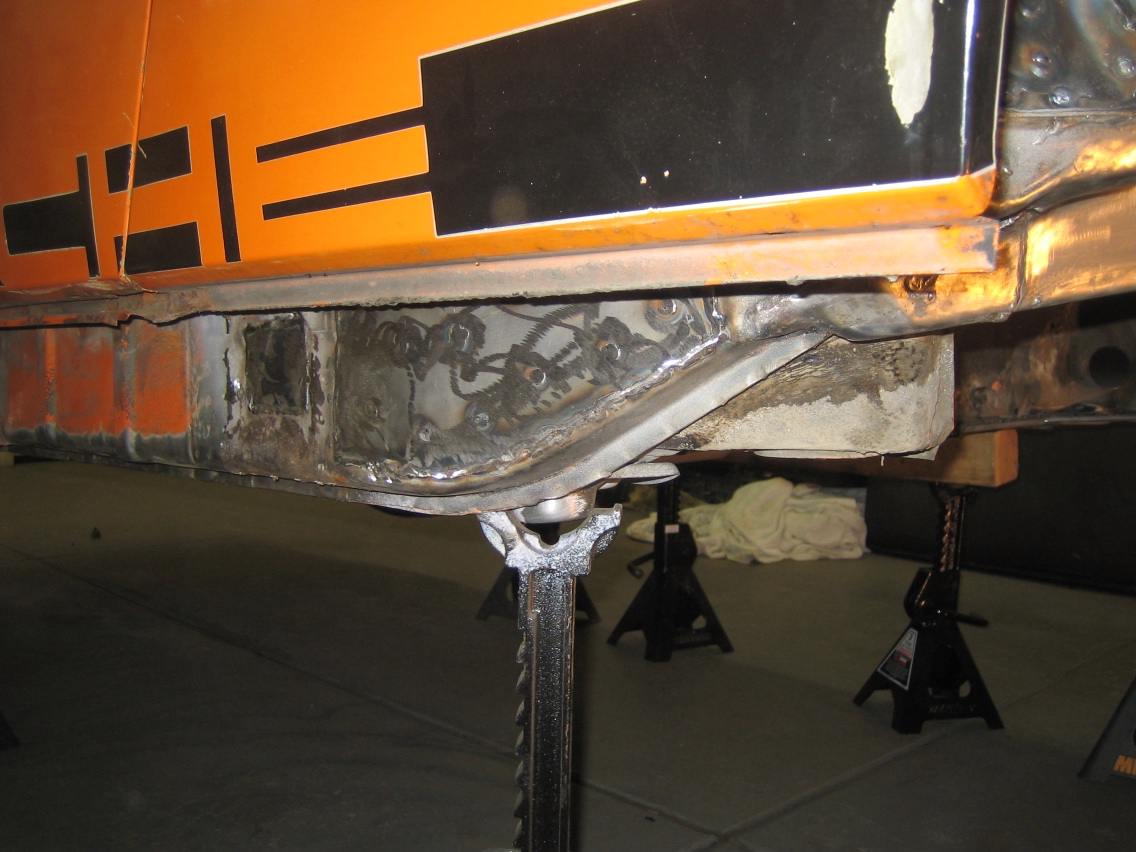
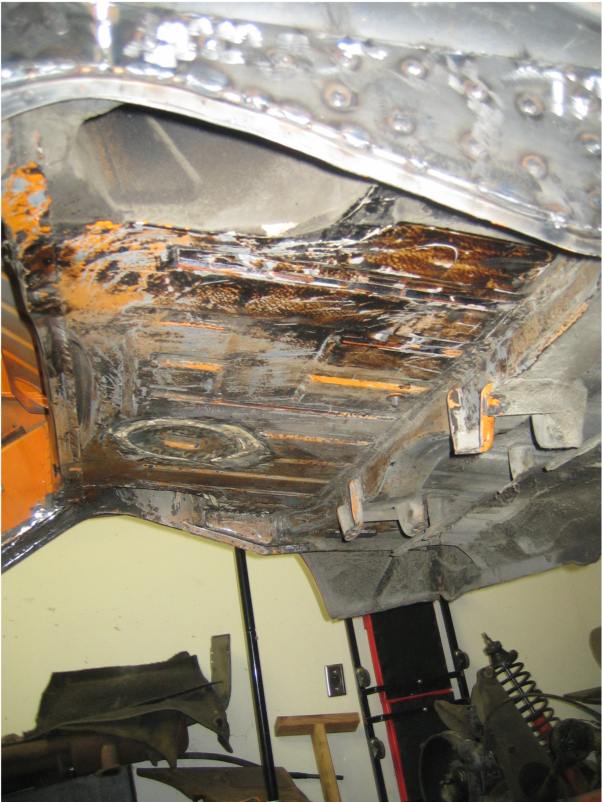
Now some work on the area below the rear trunk, lots of thick underseal here and a lot of work to remove, I removed the exhaust heat shield (spot welded unfortunately) to gain better access and glad I did. There was some superficial rust under there and very little underseal to protect that area unlike the exhaust heat shield which was plastered with it.

Cleaned up the trunk, there was rust on the trailing edge which is pretty standard but luckily the panel is sound although the paint in that area was a lot harder to remove, go figure.
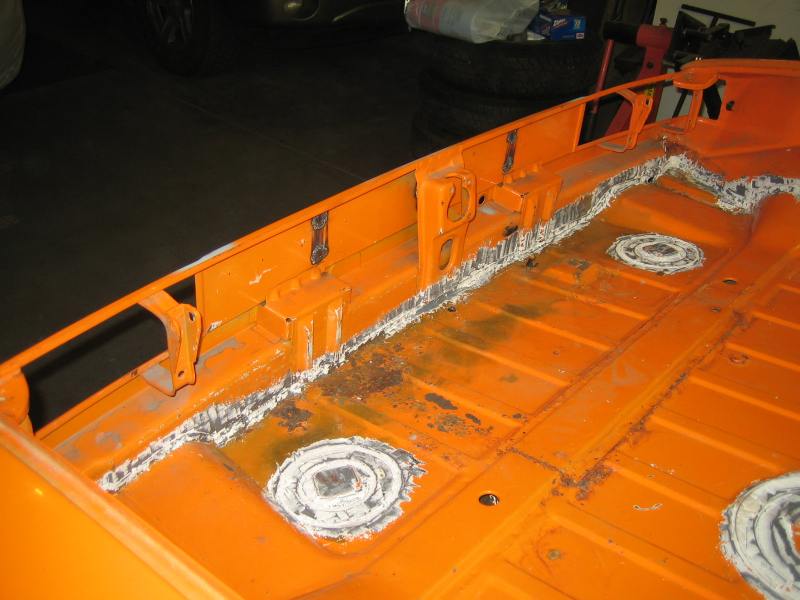
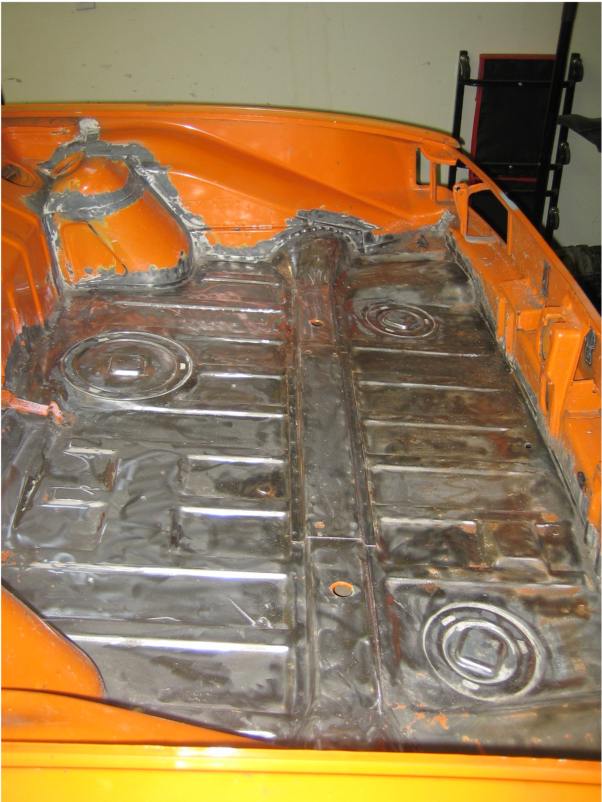
Removed the rust and cleaned up under where the fuel tank sits, this area is really tight and took way more time than I had imagined. I even tried a spot sand blaster nozzle but just ended up with sand everywhere .....
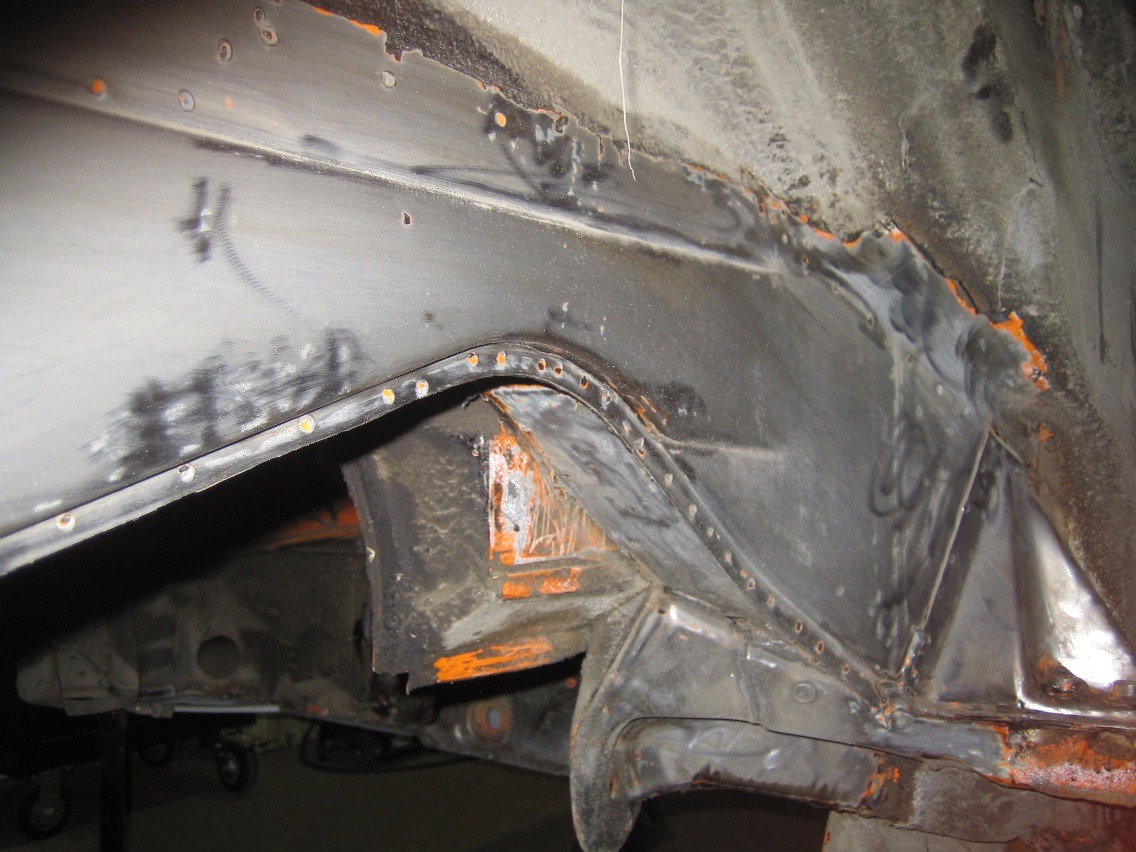
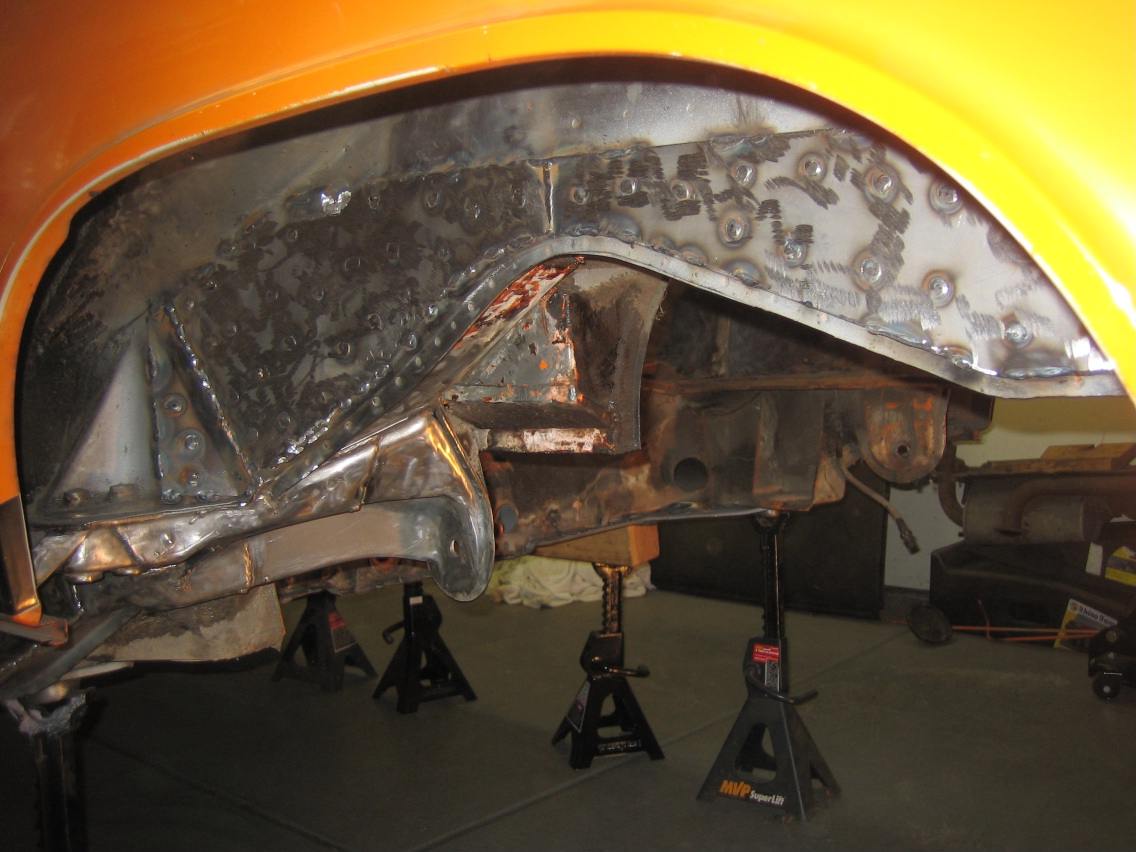
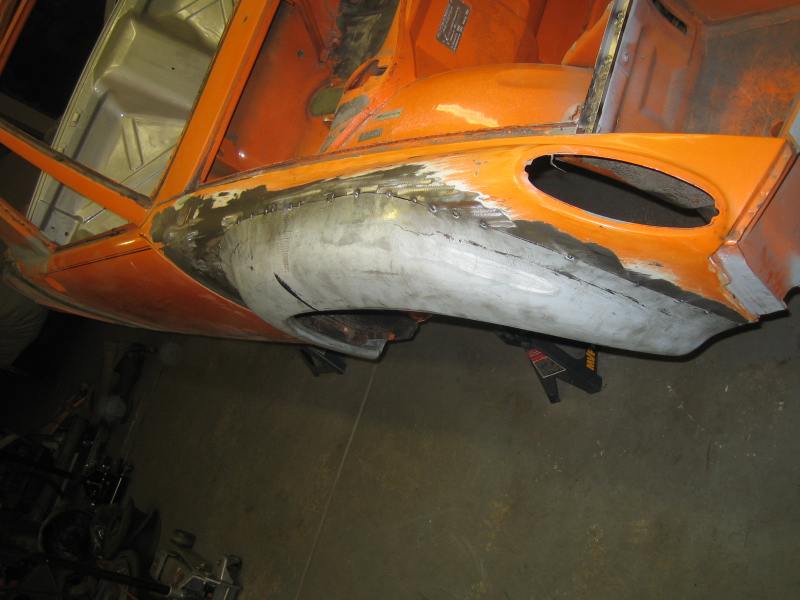
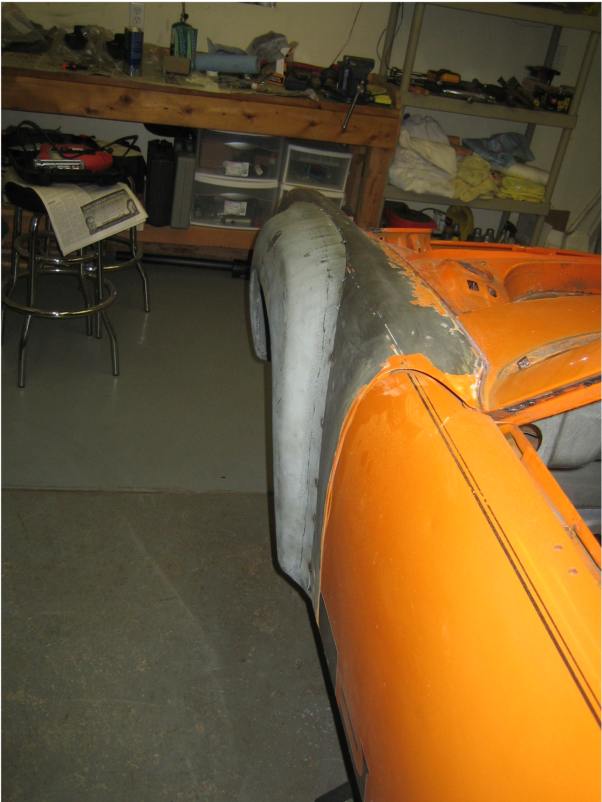
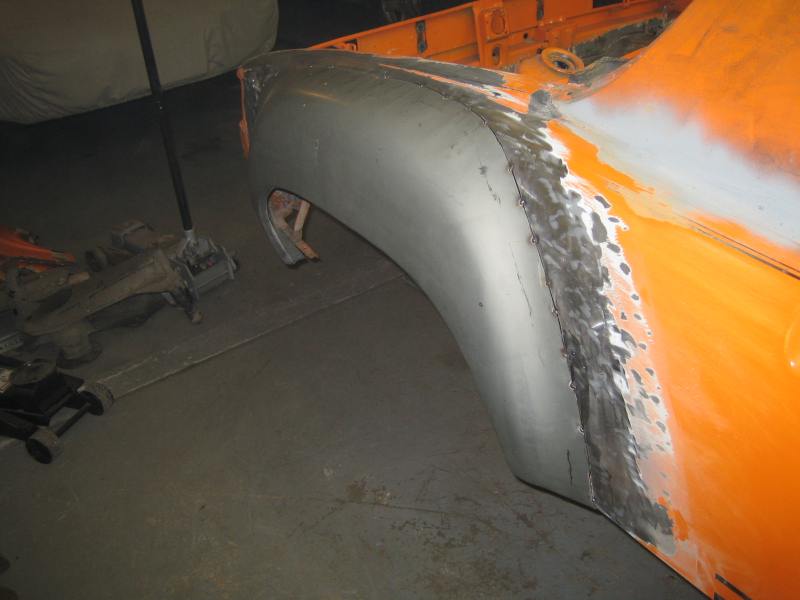
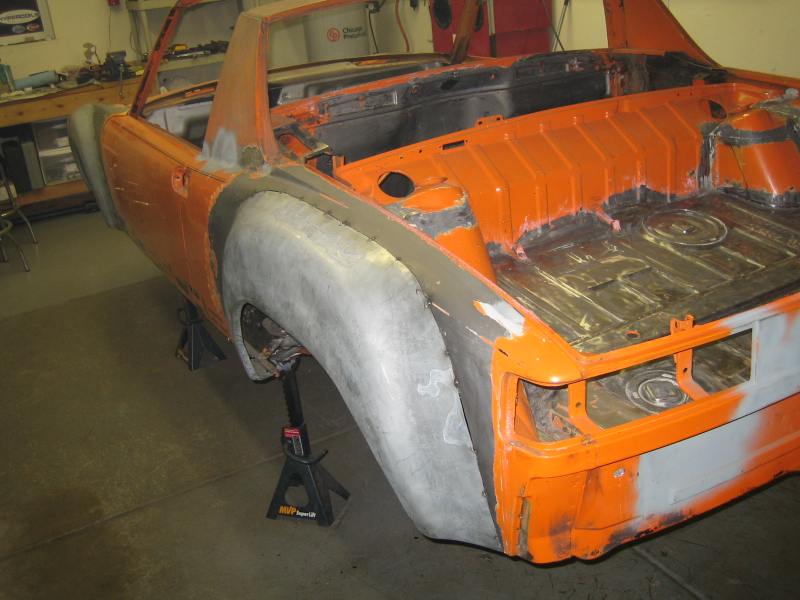
Started on the GT fenders, I placed these as accurately as I could on the body and then cut around the panel with a jig saw or small grinder and tack welded as I went. Started on the passenger side and then on the drivers side mainly to make sure the drivers side is the better :) Pictures below show each fender tack welded.
More to come ....